Freedom of choice is a great thing to be able to offer to your customers, but there’s no question that composite and configurable WooCommerce products on your website can present exponentially more back-end hassle for you than their individual, uncustomizable counterparts.
WooCommerce and the WooCommerce extensions marketplace offer a number of ways to stock your store with configurable and composite products while retaining your sanity, and what’s best for you really depends on what you’re selling.
The plugins we’ll be discussing in this article have chosen their niche and stuck with it, so let’s first take a moment to look at what sort of products are better as “configurables” and which are best off as “composites”.
What’s a Configurable Product?
For the purposes of this article, I will be using the term “configurable product” to refer to any Variable product that uses attributes to offer customizability to customers.
WooCommerce also lays out the best use cases for configurable products in its documentation with wonderful clarity:
“From an inventory perspective, a variable product is a practical way to simplify the management of many related SKUs that share the same configurable attributes. However, only a single SKU is used when a variable product is purchased — the SKU associated with the chosen variation.”
But that’s a lot of jargon, so let’s move to something more tangible.
The team behind the WooCommerce Product Configurator plugin uses a customizable watch in its support documentation and product page to display the comparative advantages of using a configurable product.
Their watch in question has 5 possible face colors, 3 possible case colors, and 11 strap colors. If that doesn’t sound like a huge amount of customizability, run your numbers again – I count 165 possible versions of this one single watch, all of which have to somehow be visible on a WooCommerce store.
Despite the scale of this math, the WooCommerce Product Configurator plugin requires fewer than 20 images in order to generate client-side visual previews of all 165 purchasable watches.
How, you ask? We’ll get into that a bit further down.
Now that we’ve got a basic understanding of what a configurable product on WooCommerce can and should be, let’s compare them to what WooCommerce considers to be composite products.
What’s a Composite Product?
Here at WooNinjas, we believe that nutshells and the things inside of them are often overused and limited in their utility.
That said, in a nutshell, a composite product is any product that is intended to be sold as an assembly or a kit and whose components require individual inventory management.
There are many plugins out there designed to help shop owners sell composite products, but we’ll be focusing on the aptly named WooCommerce Composite Products plugin, which is clear in its purpose:
“Composite Products is suitable for creating product kits that consist of multiple components with several product options.”
If that sounds like a whole lot of nothing to you, don’t worry – it kind of is. Fortunately, the folks that made the plugin provide two examples with their documentation:
- A skateboard kit with 6 different elements (deck, trucks, wheels, bearings, hardware, and optional grip tape);
- A “build-a-camera” kit several body types, lenses, and optional memory card to choose from;
We highly recommend taking a look at the documentation for WC Composite Products first, but we’ll walk through some of the defining characteristics of these products here in context as well.
Let’s talk skateboards and cameras – both make great composite products for several reasons:
- Each of the components can have variable pricing.
- For example, your shoppers could buy a set of wheel bearings that cost $20 for their custom skateboard, or they could buy expensive, high-quality ones for $80;
- Your composite product could consist of components from different brands (each of which would require separate inventory management).
- For example, your shoppers could select a Nikon camera body as the base of their super-duper camera kit, or they could use a Canon;
- Your composite product could have “incompatible” product combinations (that require management on the front-end).
- For example, if your shopper chooses 53-mm wheels for their skateboard, a good UI would not allow them to buy bearings for a set of 56-mm wheels in the same kit. That would mean your customers could mistakenly buy piles of skateboard parts that don’t fit together as opposed to an actual skateboard.
(Remember – the customer can purchase any combination of components they want with configurable products. This is not necessarily true for composite products.)
- For example, if your shopper chooses 53-mm wheels for their skateboard, a good UI would not allow them to buy bearings for a set of 56-mm wheels in the same kit. That would mean your customers could mistakenly buy piles of skateboard parts that don’t fit together as opposed to an actual skateboard.
What sets composite products apart is the fact that a single composite product is actually made up of several other products, each of which could have variable prices and requires individual inventory management.
In most cases, this means you’re working with multiple SKUs.
If you’ve made it this far, pat yourself on the back – you now have a comparative understanding of configurable and composite products on WooCommerce. Here’s a handy table for ease of reference:
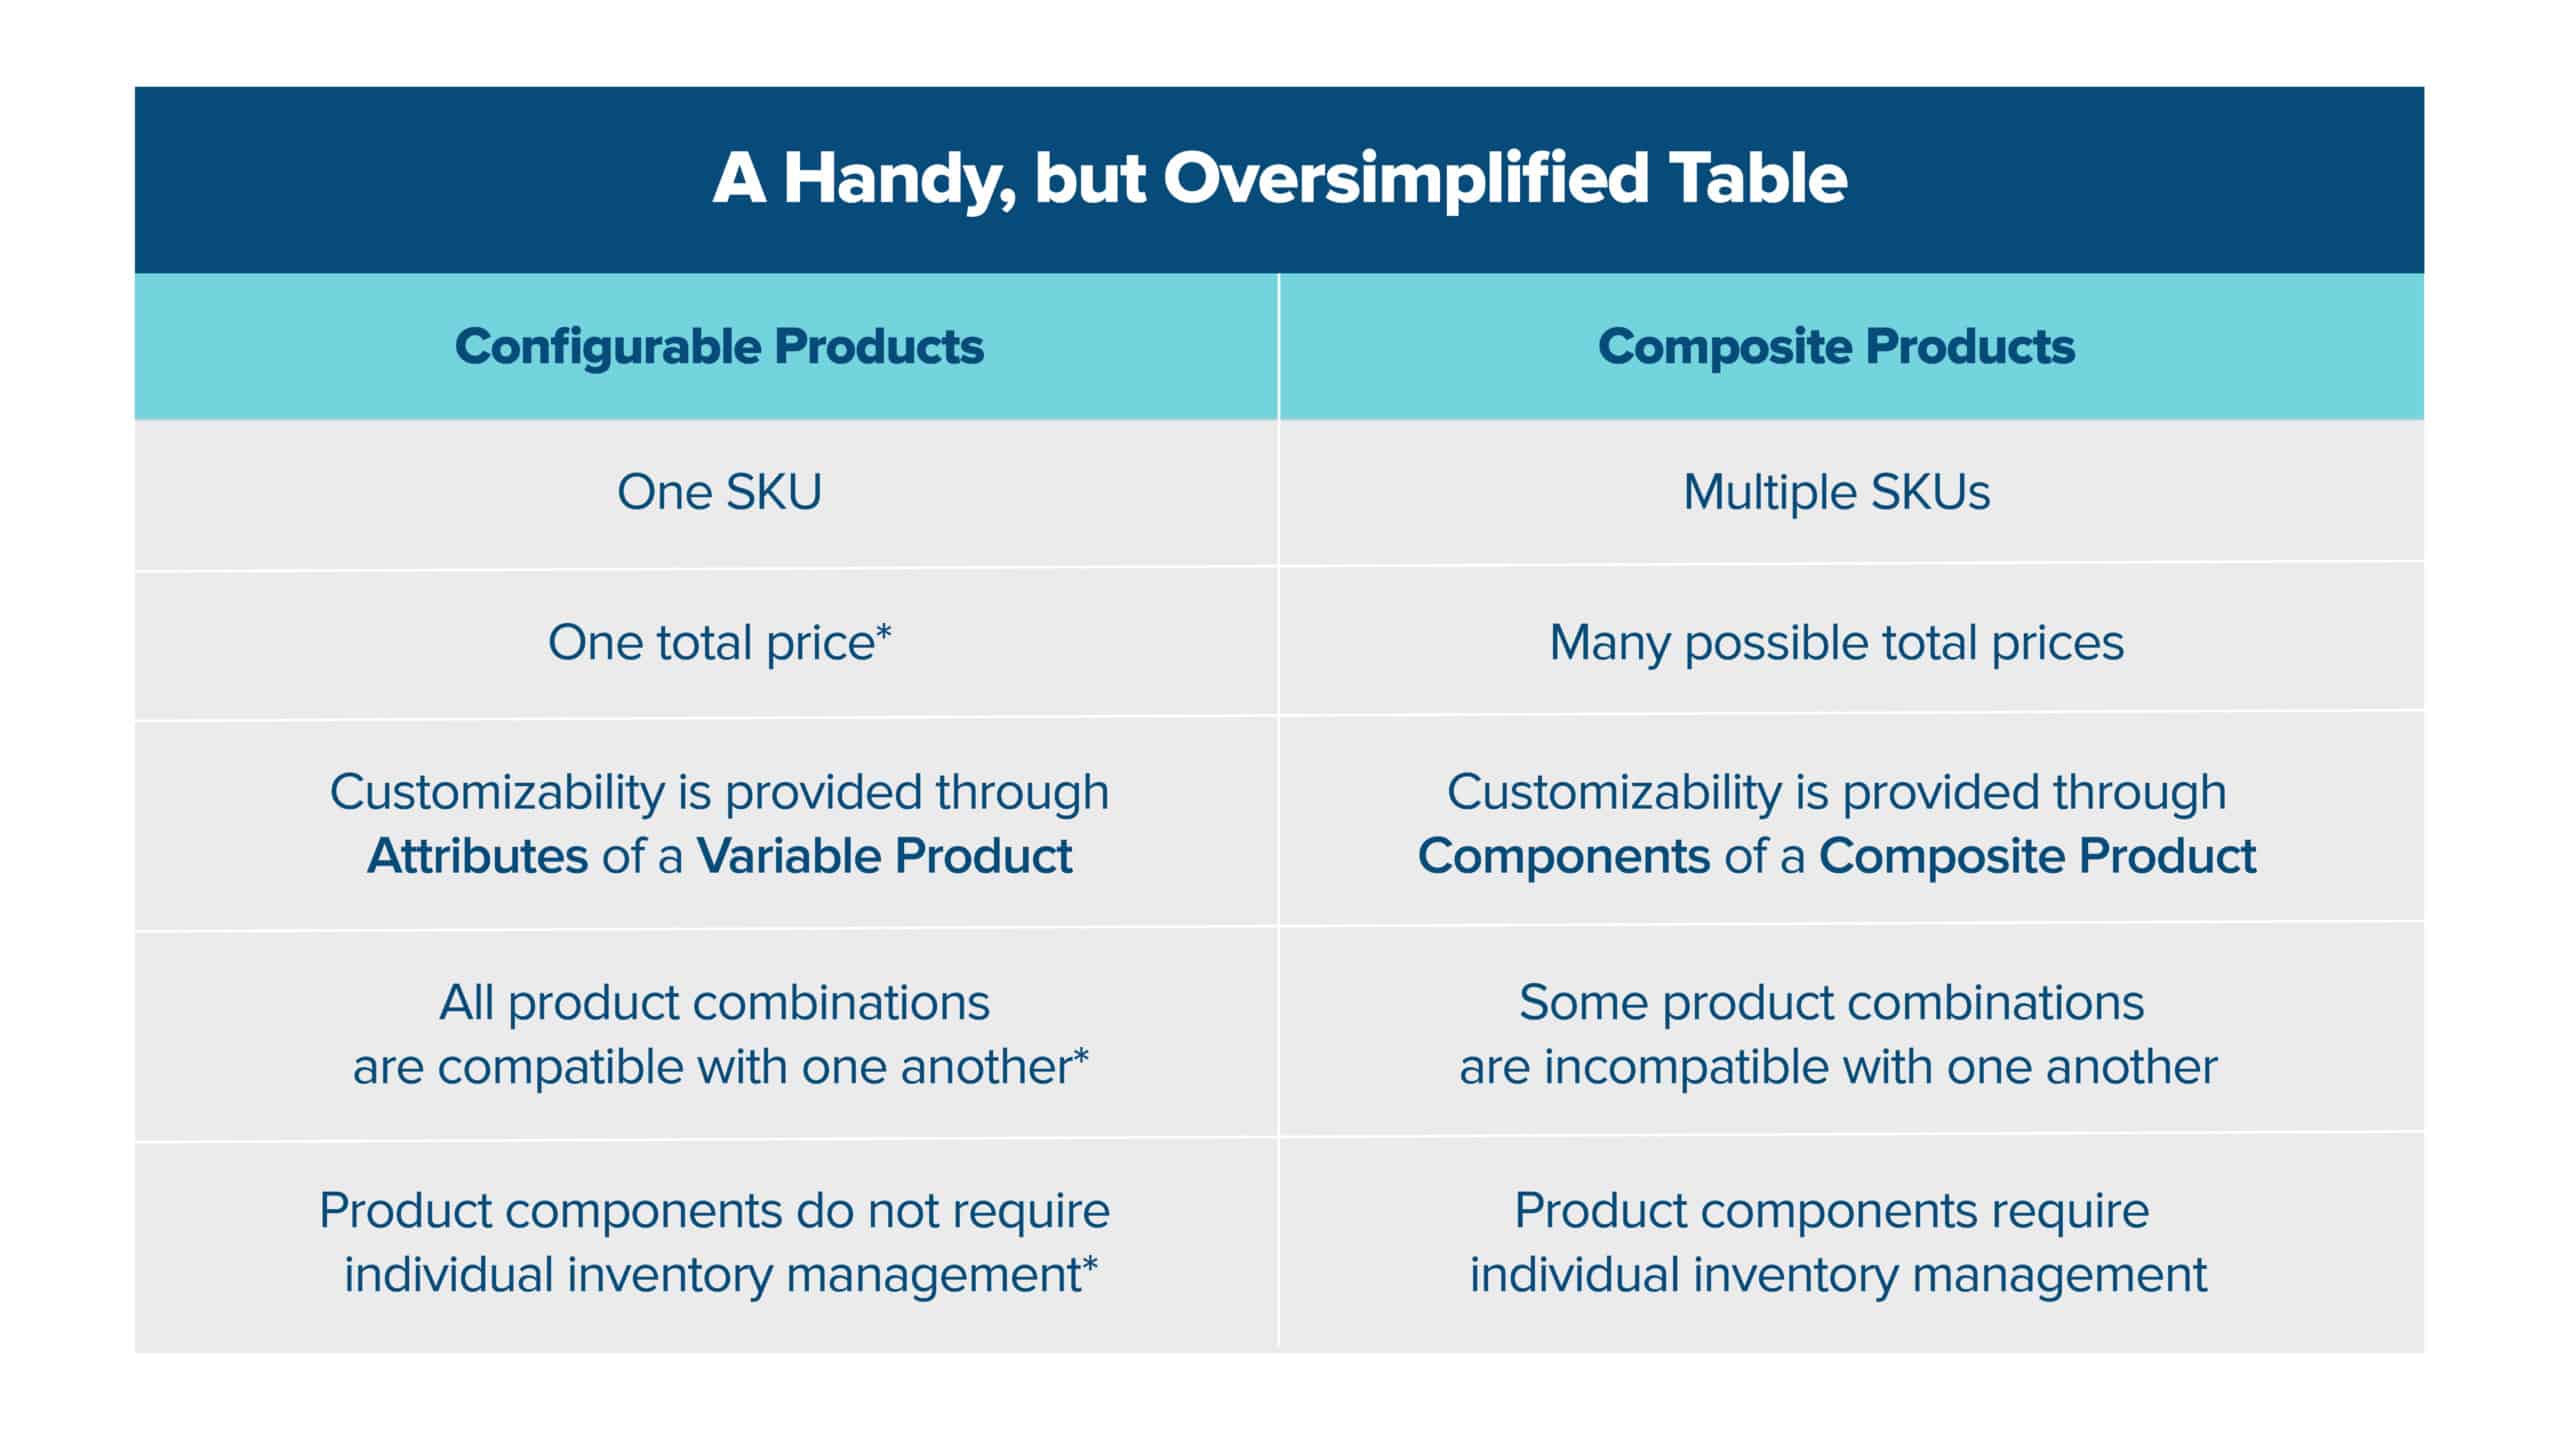
* = This is true very often, but not 100% of the time.
Now that the boring theory talk is over, let’s talk selling stuff.
How to Create Configurable Products on WooCommerce
Of course, there can be some overlap between a configurable product and a composite product, and the lines between the two can be blurred even further with specific WooCommerce plugins.
That said, for the purposes of keeping each type of product strictly in its own conceptual lane, we’re going to make some assumptions here:
- Our configurable product only has one possible “total” price;
- Our configurable product only has one SKU associated with it;
- Our configurable product’s components do not require individual inventory management;
- Customers can purchase every possible variation of the product;
Again, we highly recommend you go through the tutorials created by the authors of the plugins discussed in this article. We’re going to summarize them here in order to provide a general understanding, but no one knows these plugins better than the authors themselves.
The steps required In order to actually create a configurable product on WooCommerce are rather simple:
- Install WooCommerce Product Configurator
- Create a variable product
- Create the necessary images for your configurable product
- Add said images to your configurable product
…let’s start at the very beginning (a very good place to start, incidentally).
Step 1: Install WooCommerce Product Configurator
- Buy it here
- Download the ZIP file
- Upload the ZIP file to your plugin stack
- Activate the plugin
- Enter the license key
- Profit (Not quite yet!)
Step 2: Create a variable product
- On WooCommerce configure a product and select “Variable product” as the Product data type
- Go to the Attributes tab in the left-hand menu
- Populate the attributes in accordance with the customizable elements of your product.
- For example, the watch’s attributes in the tutorial are “Face Color”, “Case Color”, and “Strap Color”
- (Optional Step) – if you need to create more than one variation of your product, consult this tutorial
- Be sure that your variations are all in stock and have a price
- Save your product
- Go to the Configurator tab in the left-hand menu
Step 3: Create the necessary images for your configurable product
Fair Warning: this step’s a bit labor-intensive, but the ROI for your free time / boost to your UX more than makes up for it.
- Open an image editing program such as Adobe Photoshop or Affinity Photo
- Create an art board
- Gather your image layers. Each individual instance of each attribute from Step 2) should have its own image layer. Yes, that means that with this tutorial, you should have an individual PNG image for each watch strap, watch face, and watch case
- Add each layer one at a time. Make sure to place each image on a transparent background and line everything up
- Create an image to serve as a background layer and save it as a PNG
- Profit (Patience!)
Step 4: Add said images to your configurable product
- Navigate back to the product you’re building in WooCommerce
- For each attribute, upload the corresponding image layer to your media library
- Click Set Image. The layer should then be displayed in the gray box
- Repeat for all images
- Ensure your image layers are ordered correctly
- Add your background layer under the Background Image heading
- Click Save (or Update) to add your configurable product to your WooCommerce store
Step 5: Profit
- Lean back and watch as millions of people flood your servers with requests to buy your awesome new configurable product! (Sipping expensive cognac in front of a fireplace in a comically oversized chair is optional, but not discouraged)
How to Configure Composite Products on WooCommerce
We’ll be summarizing another excellent tutorial during this overview. You can find the original article here.
- Install the required plugins
- Create the composite
- Define components
- Configure pricing options
- Configure shipping options
- Configure layout options
- Finishing touches
The tutorial we are referencing is already extremely concise, but we’ll walk through the steps one at a time… as is tradition.
Install the required plugins
For the purposes of this tutorial, we are expecting you to have 3 plugins installed: WooCommerce, WooCommerce Composite Products, and Storefront.
Create the composite
- In your WooCommerce settings, click on Add Product and then create a Title, Description, and Short Description.
- Next, be sure to select Composite Product in the Product Data panel.
Define components
- While still in the Product Data panel, click on Components and then Add Component.
- Create your component and give it a name (e.g. “ABC Shimmering Blue Skateboard Deck”).
- Then, add any relevant Component Options.
- Repeat this process until all of your component options are done.
If your composite product has what are called Dependent Component Options, there are a number of ways to keep your customers from mistakenly buying incompatible Components (and then getting really frustrated with you because why would you allow that in your store?).
What are Dependable Component Options, you may ask? Let’s say you offer cameras and lenses from both Canon and Nikon as part of a single Composite Product.
You obviously can’t just stick a Canon lens on a Nikon camera, so you don’t want this option to be available to your customers. Fortunately, you can configure your store to hide Nikon lenses for anyone who chooses a Canon camera base, or vice versa.
Configure pricing options
You should still be in the Components tab of the Product Data panel.
- Select a Component and open its Basic Settings. Make sure that the Priced Individually box is ticked.
- Repeat this step for all Components.
- Once the Priced Individually box has been checked off for all Components, move to the General tab.
- In the General tab, make sure that the fields Regular Price and Sale Price are blank. No spaces, no zeros – totally blank.
Configure shipping options
Please note: we are operating under the assumption that your Components are being shipped in their original containers.
- Move to Product Data > Shipping. Choose the Unassembled option under Composite Type.
Configure layout options
- Head to the Components tab in your Product Data panel. Select the Progressive layout.
- Next, go through each of your Components and open the Options Style drop-down list. Select the type of display that you believe fits each Component.
Finishing touches
- Add product images, gallery items, and tweak your display as needed to make your shiny new Composite Product really pop!
Composite and Configurable Products on WooCommerce
As every WooCommerce shop owner knows, it’s all about the presentation. Both configurable products and composite products offer a way to make your product images really shine and keep people on your site longer.
It takes a good amount of time to click through 165 iterations of anything, and shoppers are sure to love the ability to mix and match your products to suit their specific use cases and preferences.
We here at WooNinjas have been helping business owners optimize and create WooCommerce sites for over 6 years – everything from a chat with one of our experts to a full overhaul of your site is just a few clicks away.
We hope to hear from you! And whether we do or not, we wish you the best of luck with your WooCommerce shop.