Using the PMPro Plugin with Elementor
Creating an attractive membership site does not have to be complicated. Unlike web design experts who build their page layouts from scratch, building a well-designed members-only site doesn’t have to require...
Creating an attractive membership site does not have to be complicated. Unlike web design experts who build their page layouts from scratch, building a well-designed members-only site doesn’t have to require coding or long hours.
A page builder like Elementor can be used to build your own custom pages and posts. Learn how to use PMPro and Elementor to build a visually attractive LMS membership website in this blog post today.
Creating a membership site? Find out how to build attractive pages for your members with Elementor and PMPro in this blog post. Share on XUse PMPro and Elementor To Build A Membership Site On Elementor
Install PMPro And Elementor
Before you start creating your own page templates, you will need to install the Elementor page builder to your WordPress site. You can do this easily through the WordPress dashboard by following these simple steps:
- Click on the plugin section from your Dashboard and select Add New.
- Use the search field to find the Elementor plugin by typing “Elementor”
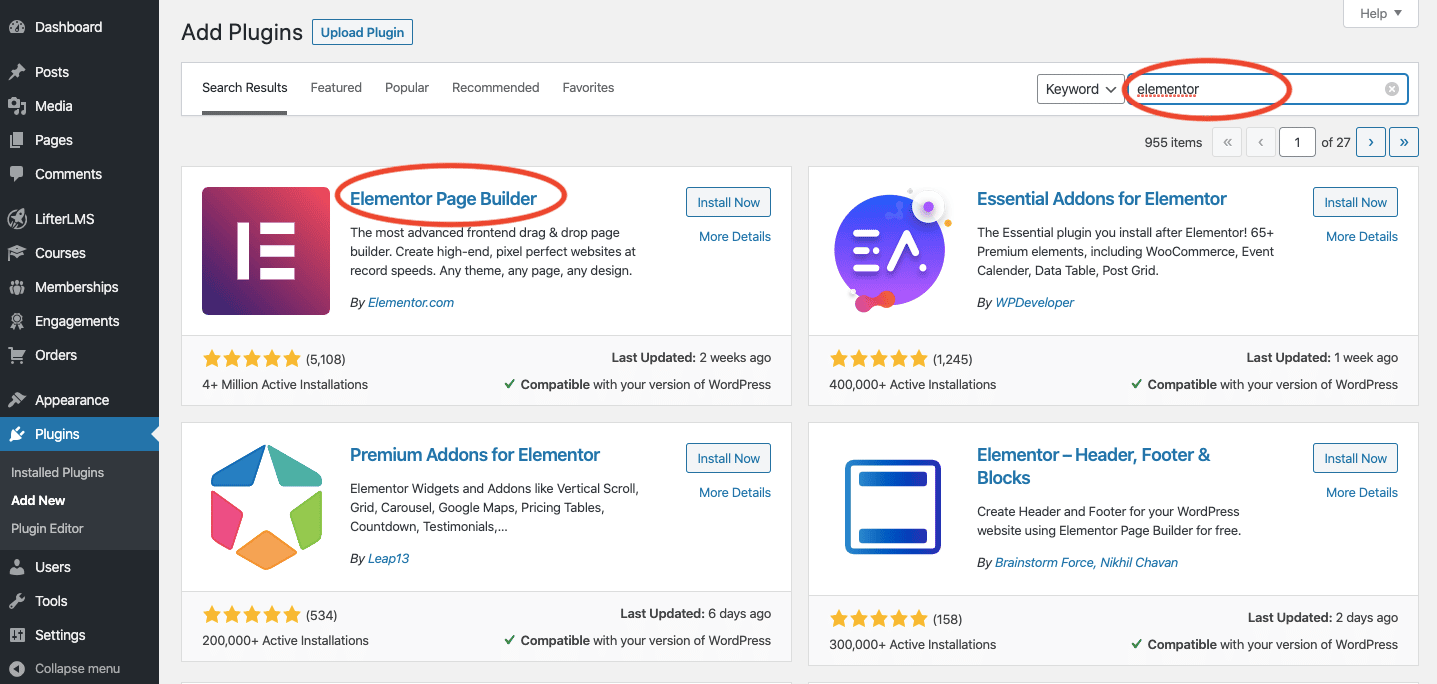
- Choose the Elementor Page Builder and click on Install
- Once the installation is finalized, activate the plugin by clicking on Activate
 6.05.46 p.m.")
You will also need to install and activate the PMPro WordPress plugin to be able to set up your membership levels and restrictions. To do this, you can follow these steps:
- Go to your WordPress dashboard and select Plugins and then Add New
- Search for the “paid membership pro” on the WordPress plugin search bar
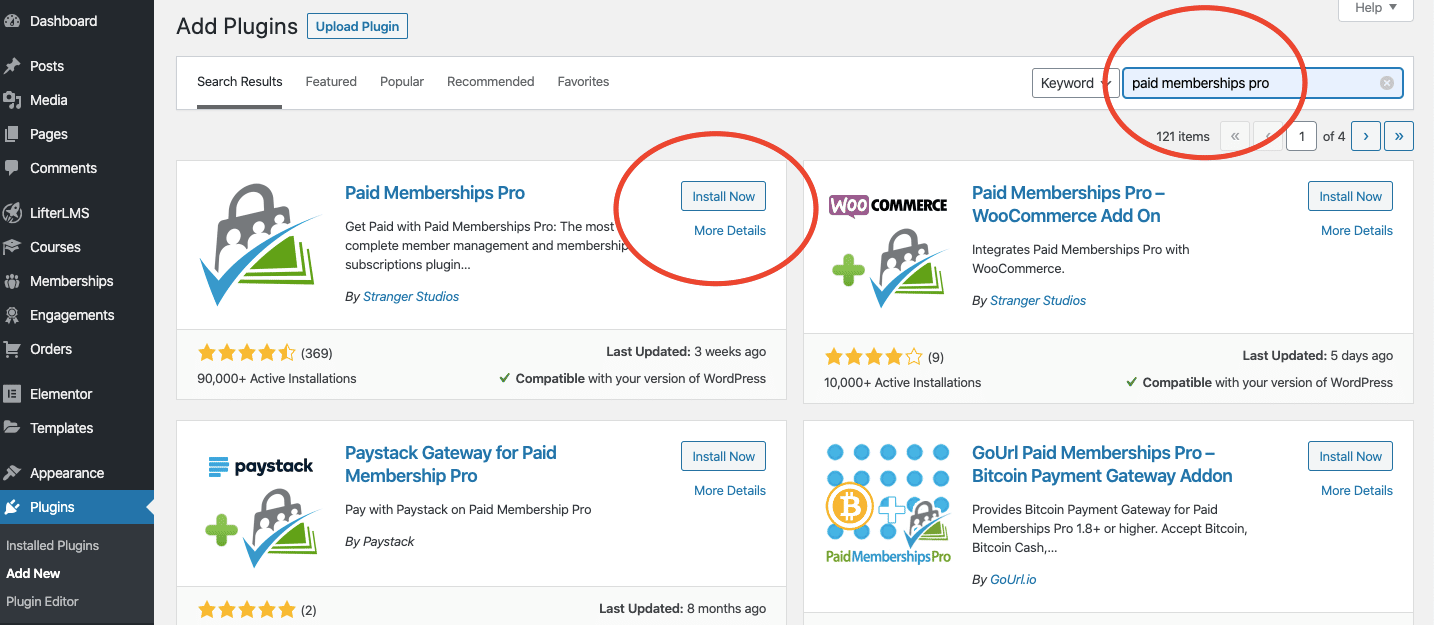
- Select the first plugin result by Stranger Studios and click on install
- Finally activate the plugin
 6.20.52 p.m.")
Add a membership level to your account
To prevent any interference between both the PMPro and Elementor plugins, you will need to assign a membership level to your administrator account. Skipping this step can cause the PMPro WordPress plugin to restrict your access to preview member-exclusive pages as they are being built. This issue is quickly solved by assigning a membership level to your account. To prevent this from affecting your users you can set your admin membership level to be private.
Design your pages using the Elementor Builder and Widgets
To design your pages using the Elementor builder, start by creating a new page. You can do this by clicking on Pages on the left side of your WordPress dashboard and then selecting Add New.
The new page default editor will open up. Next, you will need to click on the blue Edit With Elementor button at the top of the editor. This will take you to the Elementor page builder. You can start building your page from a blank canvas or work with a preselected template depending on your preference.
 6.24.07 p.m.")
To start designing your page you will have to get familiar with Elementors’ three different building blocks: sections, columns, and widgets. The first building block you will add to your page is a section, which is a large building block that can contain the other two.
Next, you will have to add a column building block within your section block. You can choose to set up your section in a single column or several.
 6.32.20 p.m.")
You can then add several widgets in each one of your columns. You can do so easily by dragging your widgets to your column section.
Some of the widgets you can add to your columns include headings, texts, images, and shortcodes. You can see the basic widget menu here:
 6.33.42 p.m.")
Once you add all your widgets in your desired placement, you can personalize the features of each one using the Elementor menu on the left of your page builder screen. You can also find more information on how to build your pages on Elementor using this tutorial.
Looking for a Ready-Made Solution?
Explore our WordPress, WooCommerce, and LMS plugins built to extend functionality without custom development.
Add default page shortcodes
PMPro will require you to display certain pages in order to complete all functions. These pages require default page shortcodes to work properly. PMPro WordPress pages include account, billing information, cancelation, checkout, and landing pages, among others. You can use Elementor to create your custom page designs for each one as outlined above. Once they are created you must select them in the PMPro dashboard here:
 7.03.26 p.m.")
Adding pages in your page settings will automatically include the required shortcodes in your pages. In some cases, when using page builders, shortcodes might not render correctly. In this case, you can manually add the specified codes using the shortcode widget on Elementor.
Add restrict membership box to content on WordPress editor
Are you ready to integrate the functions of PMPro and Elementor? Once you have designed all of your pages and content using Elementor, you can start setting up your member access restrictions
In order to do this, you will need to edit the posts or pages you want to restrict access to using the PMPro box. You can find the PMPro box here on the right of the page or post WordPress editor:
 6.45.50 p.m.")
Once you check the Restrict box, you can select the membership levels that will be allowed to view the content. Only the checked level user will be able to view a page or post. If no levels are selected, the content will be accessible to all.
 12.22.54 p.m.")
Create A Landing Page For Your Levels
One of the best ways to make use of the Elementor plugin in your membership site is to create your landing page for your PMPro levels with its page builder.
The first thing you need to do is to add a new page from your WordPress dashboard and select Edit With Elementor. You can design your page using widgets as outlined above in this article. Be sure to include all relevant information and media to illustrate the features and benefits of each membership level. This will allow you to convert as many users as possible.
You will need to add subscription buttons that link back to the membership checkout page for each level. You can do this simply by adding a button widget on Elementor, customizing its design and then adding the link to the specific checkout page for each level. You can find this link by navigating to the PMPro Membership Levels Page and clicking on the button to the membership level you are linking to. Then all you have to do is copy the URL and add it to the newly created button on your landing page.
 12.37.45 p.m.")
Once you have created your new levels, you need to make sure that your users are always directed to your Elementor customized landing page, rather than the one generated by PMPro. To do this simply access your PMPro from your WordPress dashboard and go to settings. Select the pages section and manually select your new Elementor page in the menu for Levels Page.
 12.40.39 p.m.")
PMPro and Elementor
PMPro and Elementor are functional tools you can use to create a visually attractive membership site. Integrating their functions can be done by following the steps above.
We hope you found this post useful in the creation of your premium content site. Don’t hesitate to share your views in the comments section below. If you have any more questions about using Elementor and PMPro or need extra assistance, feel free to contact us and our Ninjas would love to help you.
Need Ongoing WordPress Maintenance & Support?
We handle updates, performance monitoring, security hardening, and technical fixes so your WordPress and WooCommerce site stays stable and secure.
