WordPress Changes Not Showing? Here’s How To Fix It.
Do you have a problem with getting WordPress changes to show? This is a very common problem among WordPress users. But, why are WordPress changes not visible on your site?...

Do you have a problem with getting WordPress changes to show? This is a very common problem among WordPress users. But, why are WordPress changes not visible on your site? In almost all cases, the problem stems from caching issues, either in your own web browser, your WordPress site’s cache, or your content delivery network (CDN) cache.
In this article, our WordPress development team will discuss the possible causes for your WordPress changes not showing and why caching can cause issues with WordPress changes displaying. We’ll also show you several ways to fix the problem and make it so that you and your site visitors can see your site updates.
What is Caching?
Caching solutions will store static versions of your website in a cache. This allows WordPress to avoid running heavier PHP scripts every time your site loads.
The caching process helps to improve WordPress speed and performance, and the overall user experience.
There are different types of caching solutions available for WordPress. The most popular method is using a WordPress caching plugin like WP Rocket or WP Super Cache.
Popular WordPress hosts like Bluehost and SiteGround also have built-in caching for their users.
If you’re using a web application firewall like Sucuri or Cloudflare to improve your WordPress security, then there’s also a cache to speed up your site and reduce downtime.
Most modern web browsers will also store cached versions of pages on your web browser.
If changes are not showing on your WordPress site, the first thing you should try is to open your website in Incognito Mode and check if the changes appear. If they appear, you’re probably dealing with a local caching issue.
How to clear browser cache
Desktop
The browser cache is a cache saved in the web browser used by the visitor.
Here static files are saved like stylesheets, JavaScript, images, and other website files in the visitor’s browser to save bandwidth and improve response times during current navigation or for future visits by that visitor to our website.
All web browsers allow you to clear the cache, but the process varies according to each browser. In this case, we are taking a look at how to do it using Google Chrome since it is one of the most popular browsers.
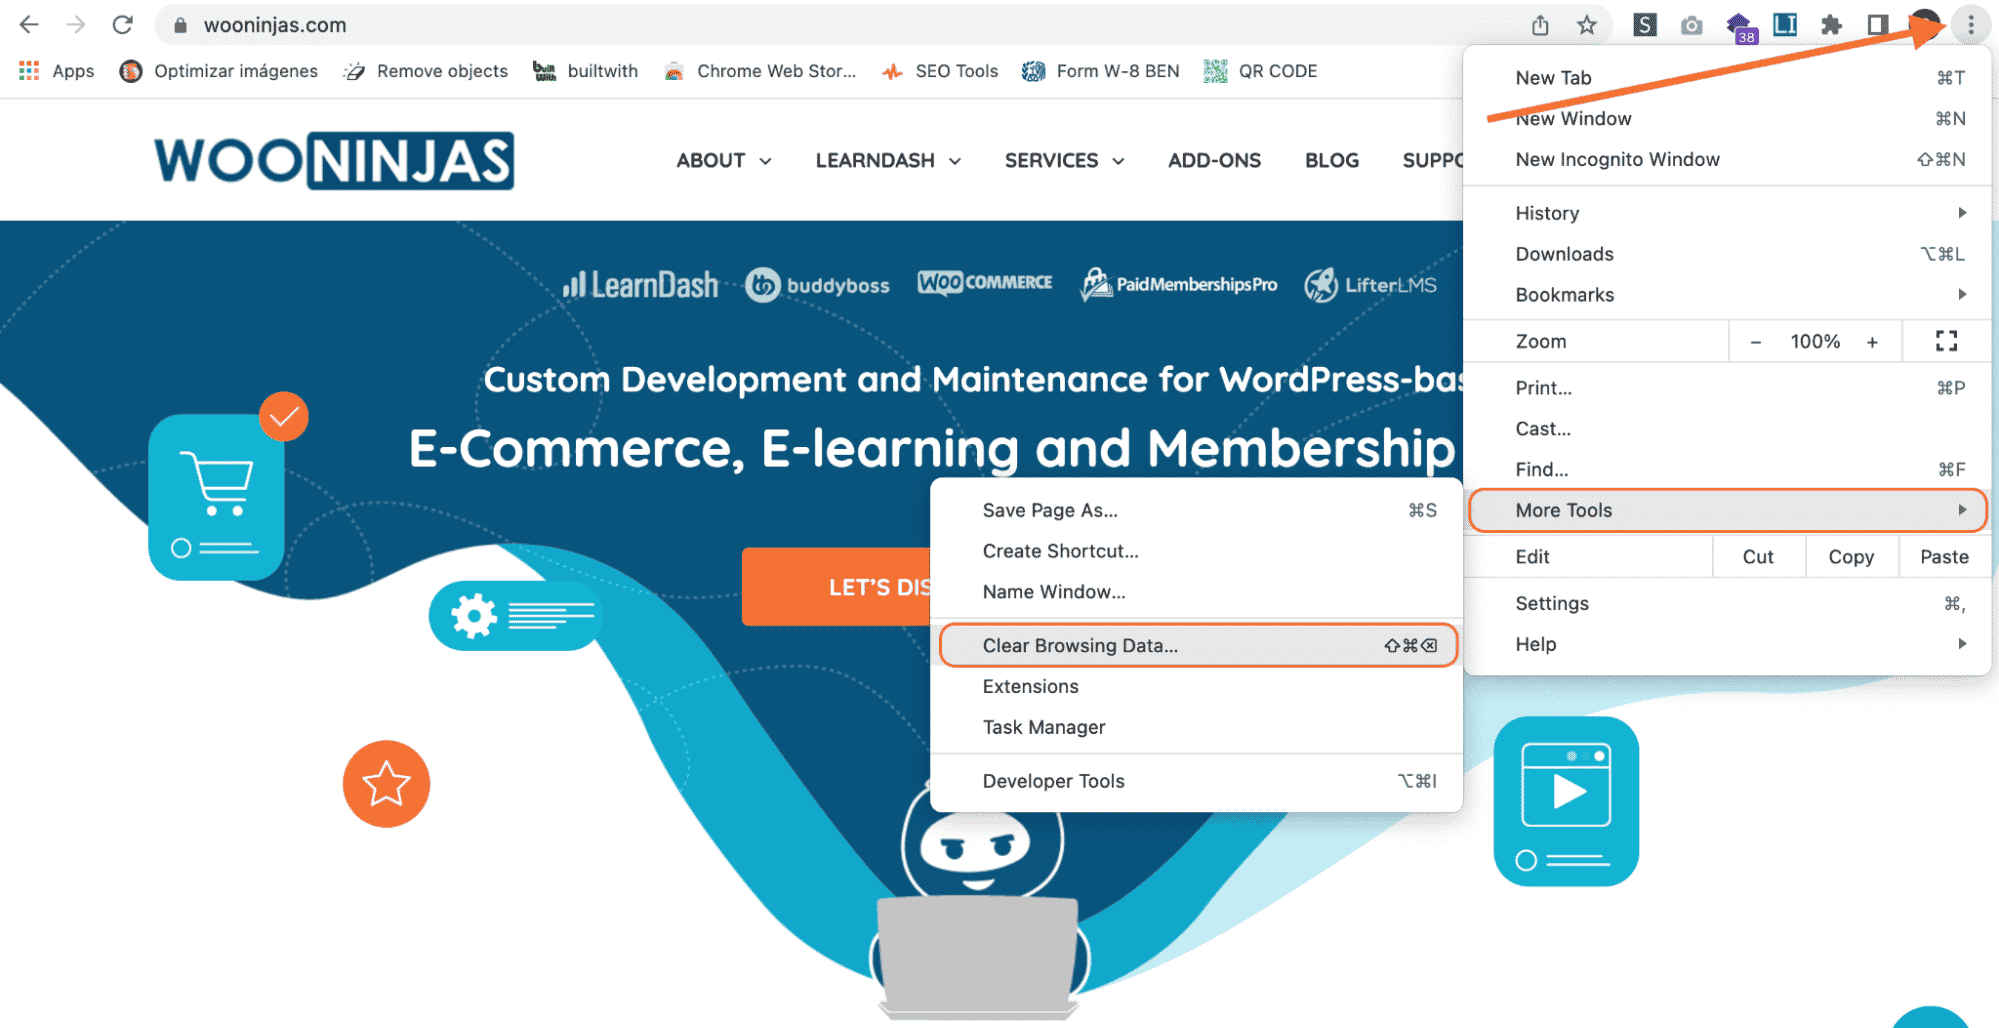
To start, click on the menu icon, then select More Tools > Clear Browsing Data.
This will launch the Chrome Settings page with ‘Clear Browsing Data’ popup displayed on the screen. Click the Advanced tab, change your Time range to All time, and select all boxes, except Passwords and other sign-in data and Content settings. Click Clear data.
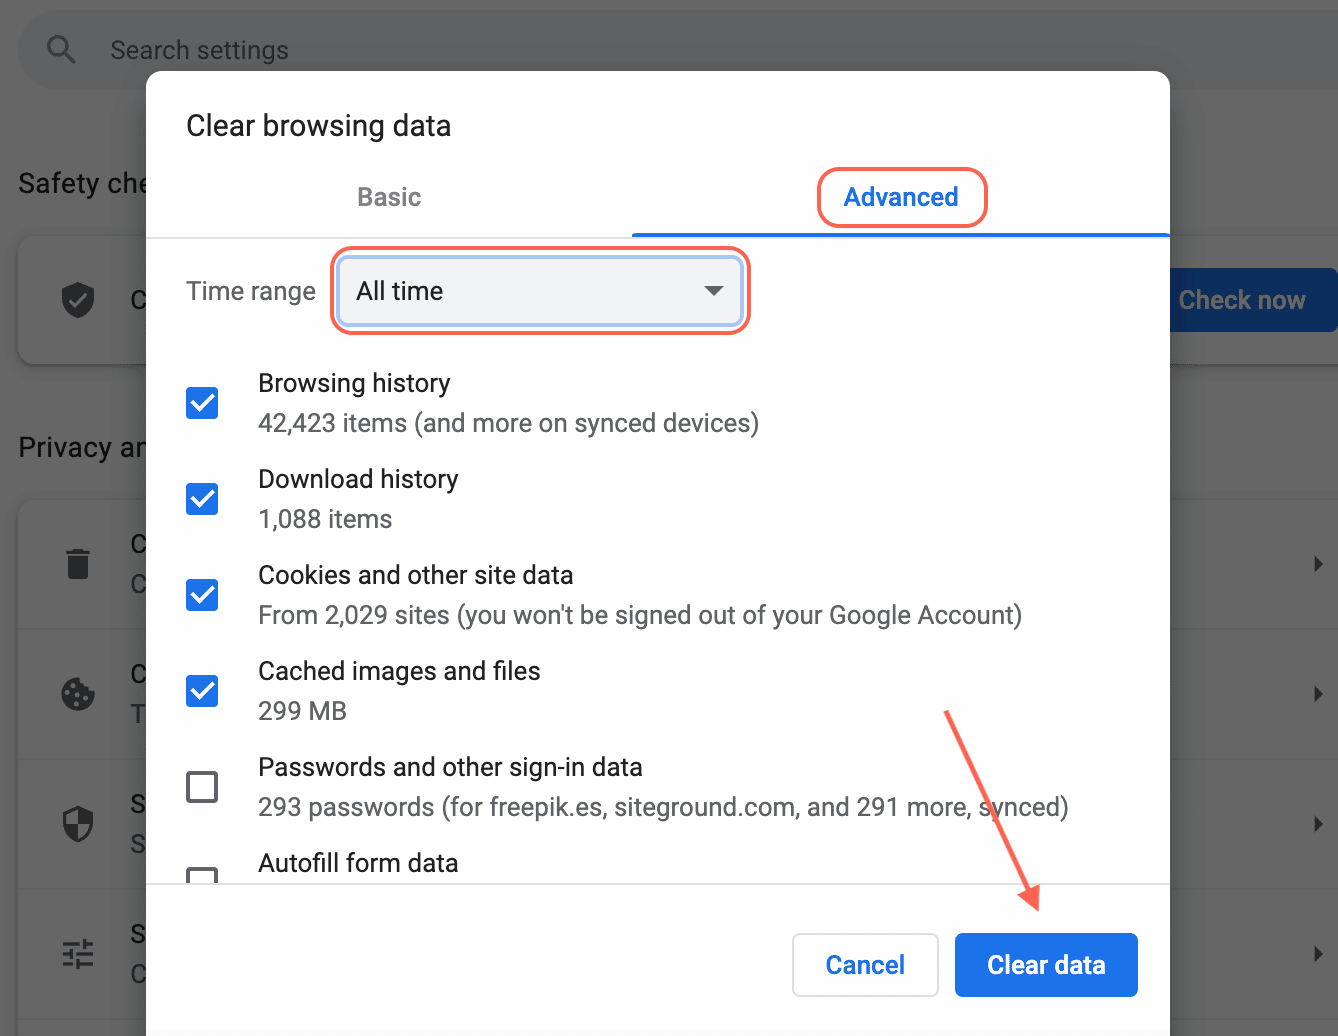
Close your browser and relaunch Google Chrome.
Mobile
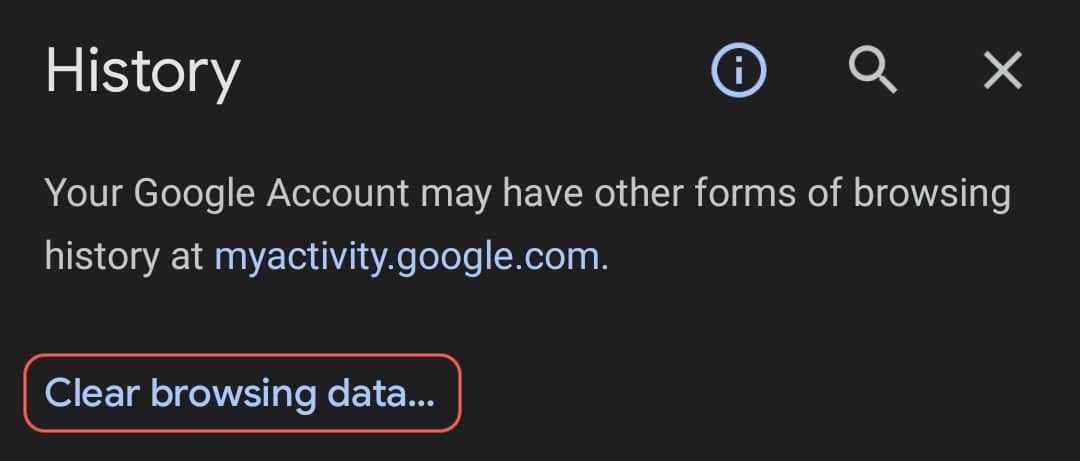
Open the Google Chrome app for iPhone, iPad, or Android. Tap the “More” icon (it looks like three dots) at the top-right of the screen for Android devices and the bottom-right of the screen for Apple devices.
Tap History, then Clear Browsing Data.
Looking for a Ready-Made Solution?
Explore our WordPress, WooCommerce, and LMS plugins built to extend functionality without custom development.
Click the Advanced tab and choose a time range. Options range from the last hour to all time. Make sure the boxes for Cookies and site data and Cached images and files are checked. Tap Clear data on Android devices, or Clear Browsing Data on Apple devices.
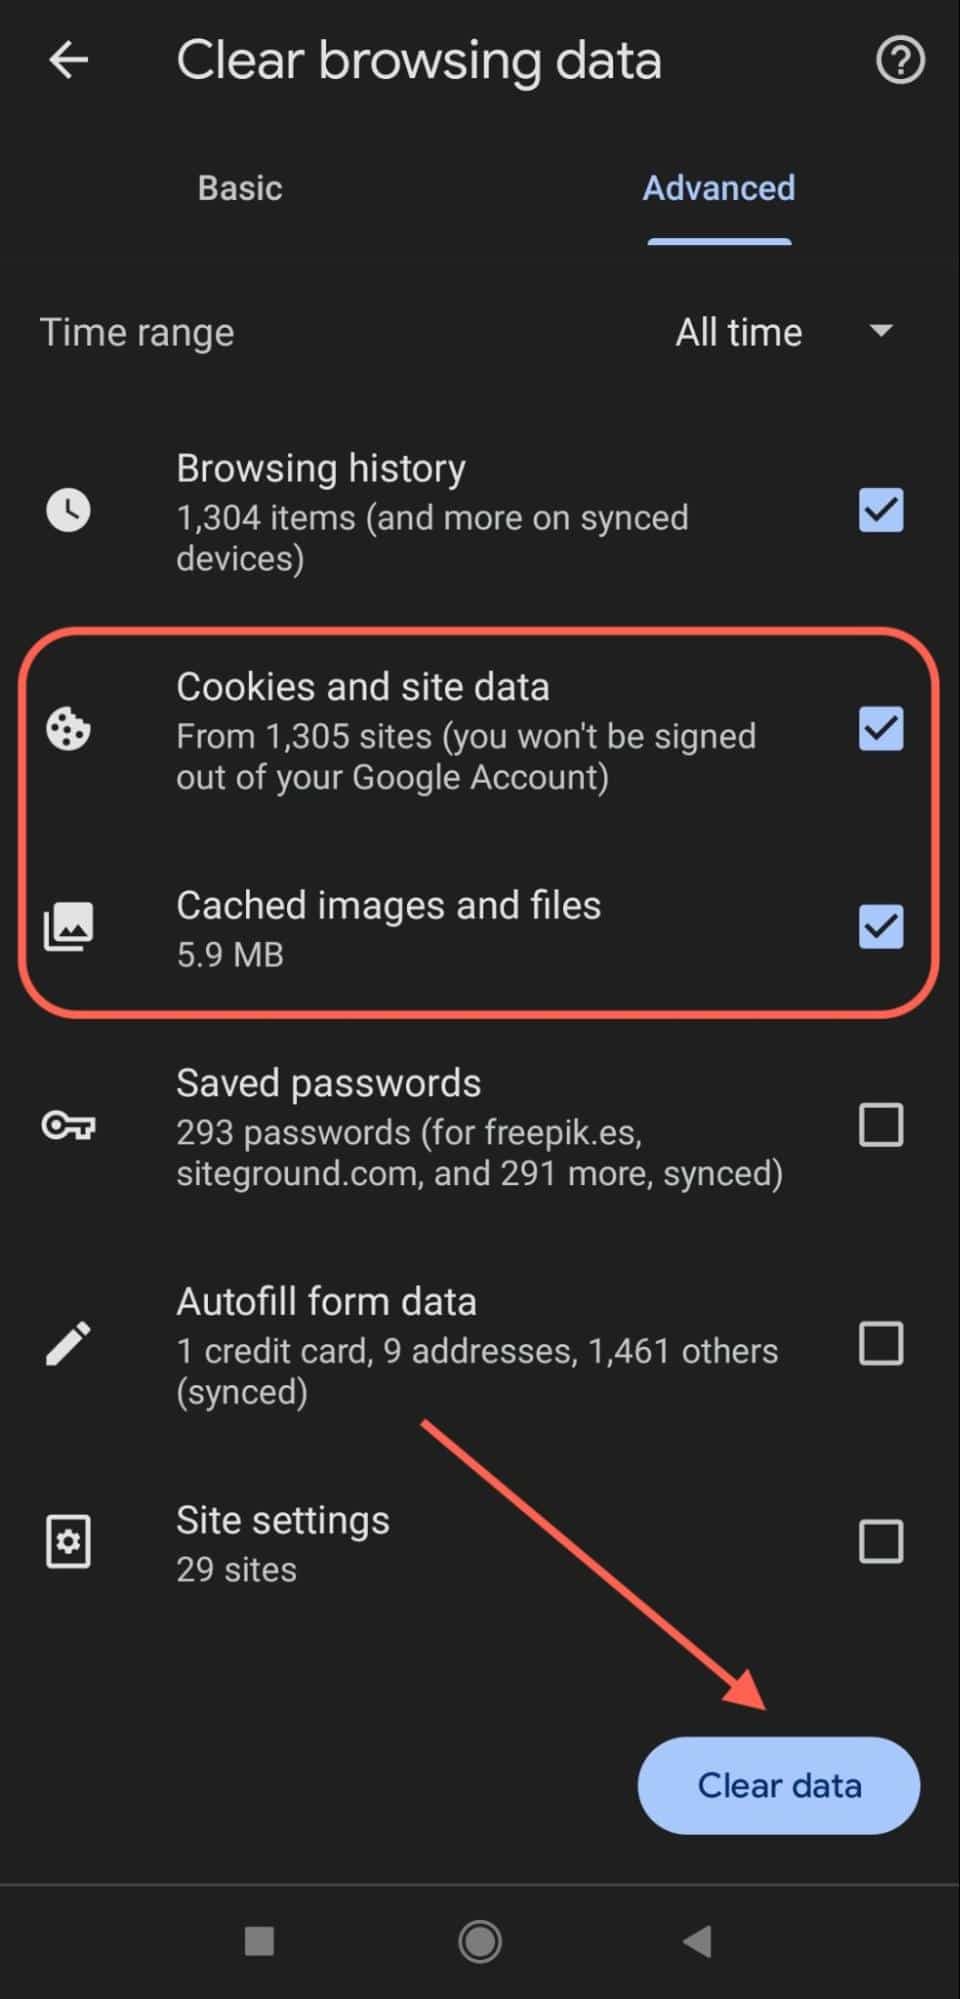
Pro tip: Before you clear the cache and cookies on an Apple device, make sure you know your Google Account password or that your recovery phone number and email address are up to date, as clearing your cache and cookies might sign you out of Google.
How To Regenerate Elementor CSS?
Are you using the Elementor page builder? If you have already cleared the browser cache and still have not seen the changes you made to your website, then the next step is Regenerate Elementor CSS.
Elementor Page Builder replaces the basic WordPress editor with another type of editor to work in real-time. Therefore, you can create complex visual layouts and design a website in real-time without having to switch between editor and preview mode.
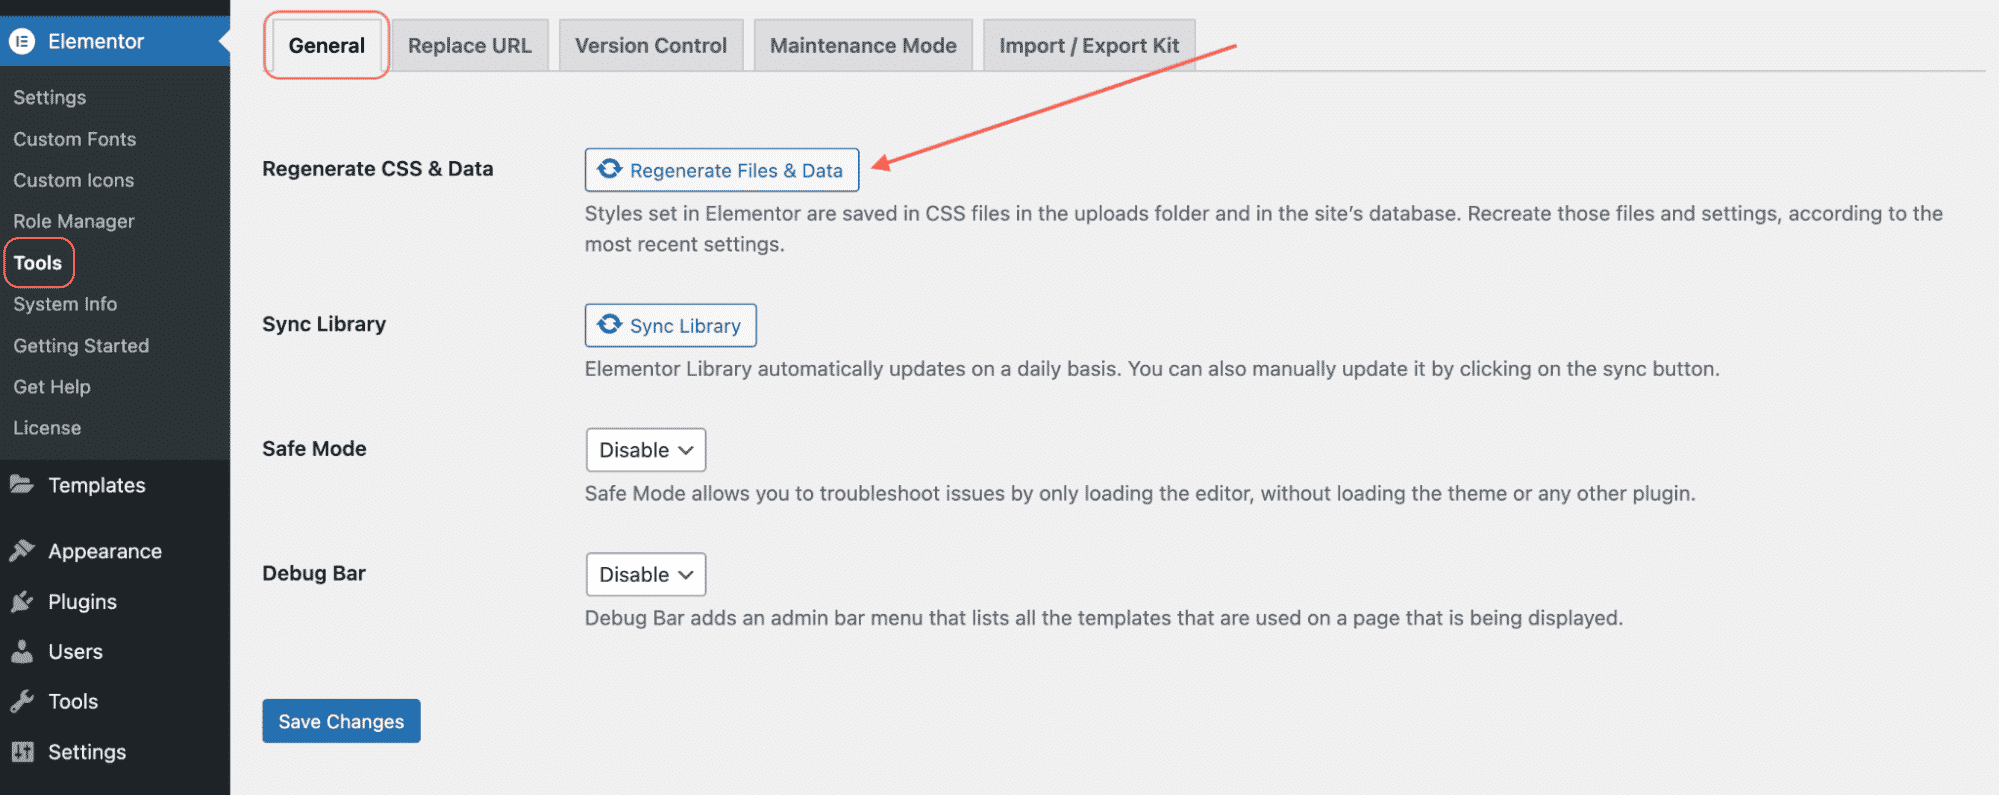
Remember that the linking of the images and stylesheets of the website can be recovered by the option ‘Regenerate CSS & Data‘.
Elementor plugin appears on the WordPress Dashboard as follows, inside the main CMS menu on the left:

Once logged in, in the side menu on the left of WordPress, go to Elementor > Tools > Regenerate CSS and click the Regenerate Files button.
As you have seen, with a simple regeneration of the CSS files you can make the Elementor images and styles work again in WordPress. It may seem “nonsense”, but if you know what to do, the solution to the problem is achieved in 1 minute.
Clear Cache in Your WordPress Caching Plugin
If you’re using a WordPress caching plugin on your site, then you need to clear your plugin cache.
Here’s how to clear your cache with some of the most popular WordPress caching plugins.
WP Rocket
WP Rocket is not only the most powerful caching plugin on the market, it’s also very easy to use.
The installation itself requires no coding skills and no configuration is needed to start seeing results. It is also compatible with most tools, from hosting to other plugins.
Simply go to the Settings > WP Rocket and click on the ‘Clear Cache’ button in the plugin dashboard.

WP Super Cache
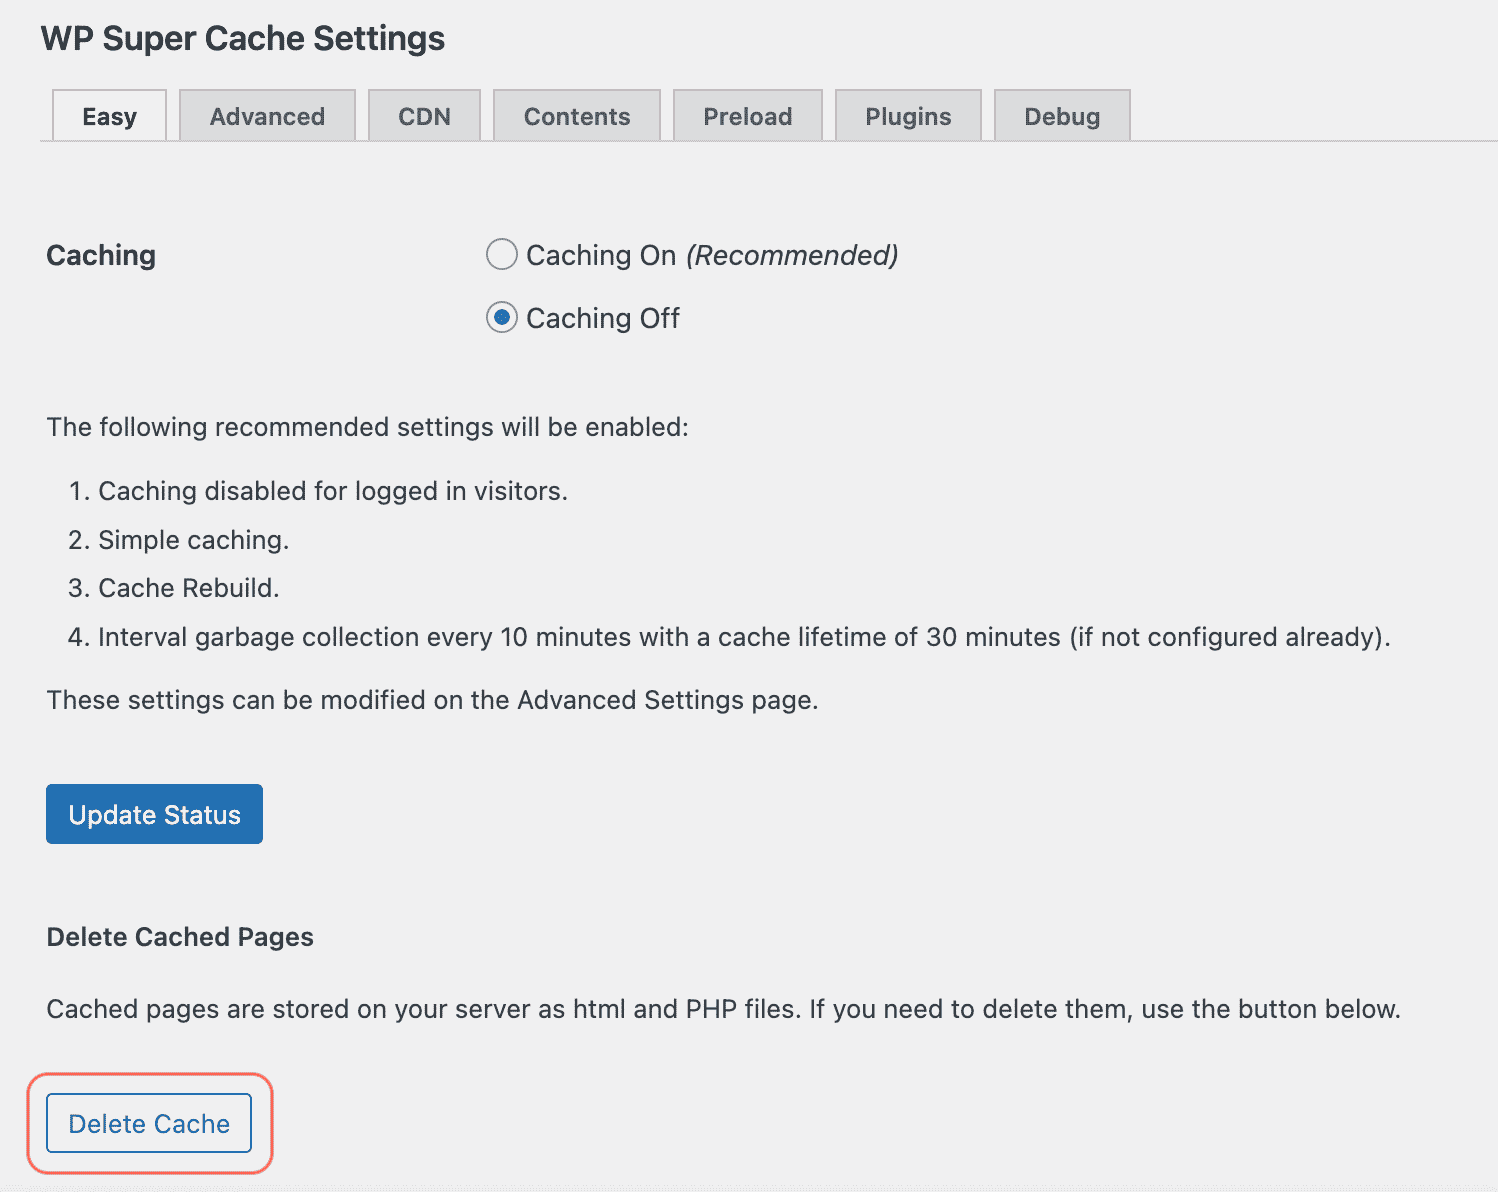
WP Super Cache is free and open-source, no need to update after being installed. It works efficiently by creating static HTML files and serving them instead of heavy PHP scripts in WordPress. One benefit of choosing WP Super Cache is that it offers three caching modes. One is simply called Simple Mode, which is perfect for the average WordPress user as it is the least risky.
Simply go to Settings > WP Super Cache in your WordPress admin dashboard, and then click the ‘Delete Cache’ button in the ‘Delete Cached Pages’ section.
Conclusion
WordPress changes not showing is a very common problem among WordPress and Elementor users, however, in most cases, it is easy to solve. If you are still struggling with this error after implementing the steps above or if you need additional help troubleshooting and maintaining your site, don’t hesitate to reach out to our team of WordPress developers.
Need Ongoing WordPress Maintenance & Support?
We handle updates, performance monitoring, security hardening, and technical fixes so your WordPress and WooCommerce site stays stable and secure.
How to Create High-Performing WordPress Sites with AI In 2026
Discover the best WordPress AI website builders in 2026. Follow our step-by-step guide to build high-performing sites faster using AI…
Read More...
How Universities Use WordPress LMS (Case Study Hub)
WordPress LMS for universities: see how the University of Michigan used LearnDash and custom add-ons to deliver online education at…
Read More...
7 Best WordPress Plugins for Email Marketing & Newsletters
Here is a list of 7 Best WordPress Plugins for Email Marketing & Newsletters. Choose the one that suits you…
Read More...