Increase WordPress Memory limit and say goodbye to your troubles. Fatal errors are an annoyance all webmasters have to deal with at some point. Thankfully, our team of experienced WordPress ninjas is here to help.
Have you had problems getting your WordPress plugins to load correctly? Perhaps you’ve experienced difficulties with getting your site to respond or even seen the dreaded “Allowed Memory Size Exhausted” fatal error notice on your screen. Worry not!
In this article, our WordPress experts will teach how to increase WordPress memory limit and avoid these issues for good.
What Causes The Fatal “Allowed Memory Size Exhausted” Error?
WordPress uses PHP scripts to perform most of its functions. PHP runs on your website servers, so all PHP actions executed on your site will end up consuming some of your server memory. The “allowed memory size exhausted” error occurs when running a site exceeds the consumption of available RAM memory and resources.
Typically, the bigger your site, the more plugins you employ, and the higher your traffic, the higher your memory requirements will be.
WordPress is preconfigured to use a set maximum of 32 MB of server RAM for each process, greatly limiting your system. Some hosting providers can sometimes allocate a larger amount of PHP memory to their clients, raising the memory limit to 64 MB. Yet, this is typically not sufficient for most large-scale websites or those working with several plugins.
How much memory do you need?
If 32-64 MB memory does not suffice, how much do you need? Typically, 128 MB provides enough memory space for most pages, but you can raise the memory limit up to 256 MB if required.
Before you look into increasing the memory limit on your WordPress site, we recommend you first look into the cause of the problem. If there is an underlying problem causing excessive memory consumption, resolving the issue directly will be far more beneficial than temporarily fixing the problem by expanding the available memory.
How to Increase the PHP Memory Limit in WordPress?
If you’ve updated your PHP, removed poor-quality plugins, cleaned up your content media, and you’re still getting memory errors, you may need to increase the memory limit.
There are several ways to accomplish this goal:
- Edit your wp-config.php file.
- Edit your .htaccess file.
- Use a plugin to increase your memory capabilities.
- Contact your hosting provider.
Let’s take a look at each one!
1. Edit your wp-config.php file.
To start increasing WordPress memory limit andedit the wp-config.php file, you will need to access your site with SSH or FTP. This allows you to edit sensitive internal files that affect the way your site works.
You’ll only be changing one line, so it should be easy. Start by installing Cyberduck, FileZilla, or another FTP client of your choice. For the purpose of this small tutorial, we’ll be referring to Cyberduck as our tool of choice.
At WooNinjas, we always encourage taking all the necessary precautions to preserve the integrity of your site. Before you start, please consider making a backup of your website. It’s easy to accidentally break something while editing core files, so it’s better to be safe than sorry.
Editing your website’s core files? Remember to make a backup of your site before making any changes so that you can recover your site if you make a mistake. Share on XNow that you’re all set, let’s get to the editing.
Open Cyberduck and enter your credentials. After a few seconds, you should be connected to your site.
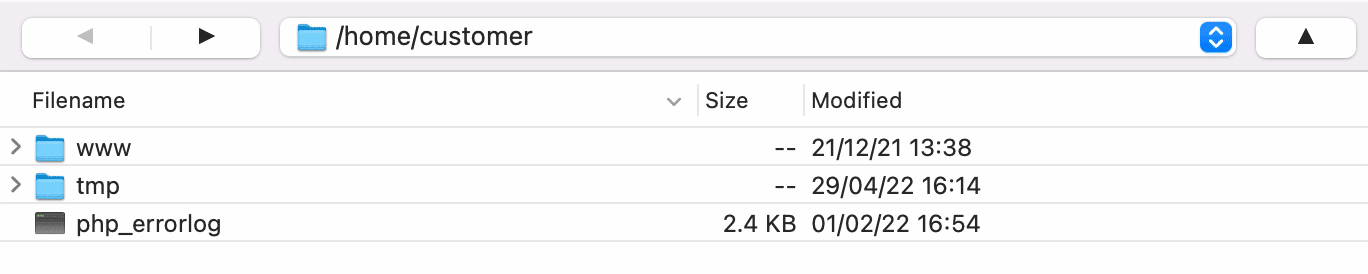
Open the public folder. If you can’t find a “public” or “public-html” folder, consider the folder could be saved as “root”, “www”, or your website’s name.
Next, find the wp-config.php file.
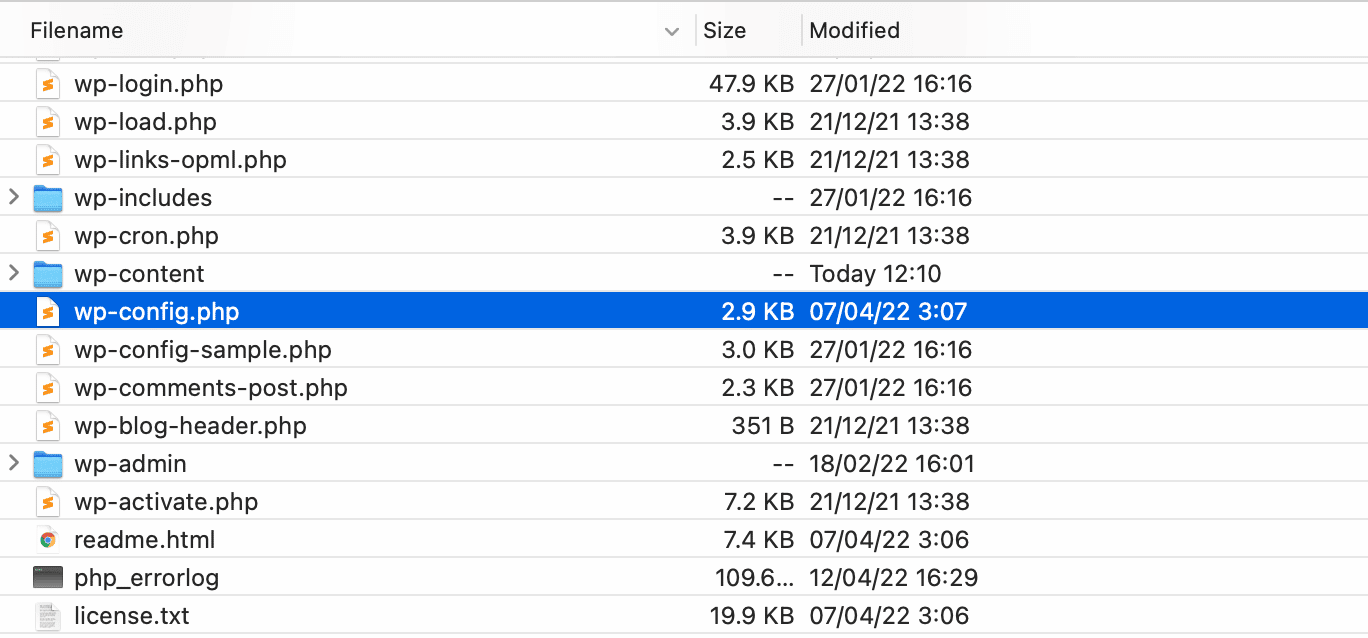
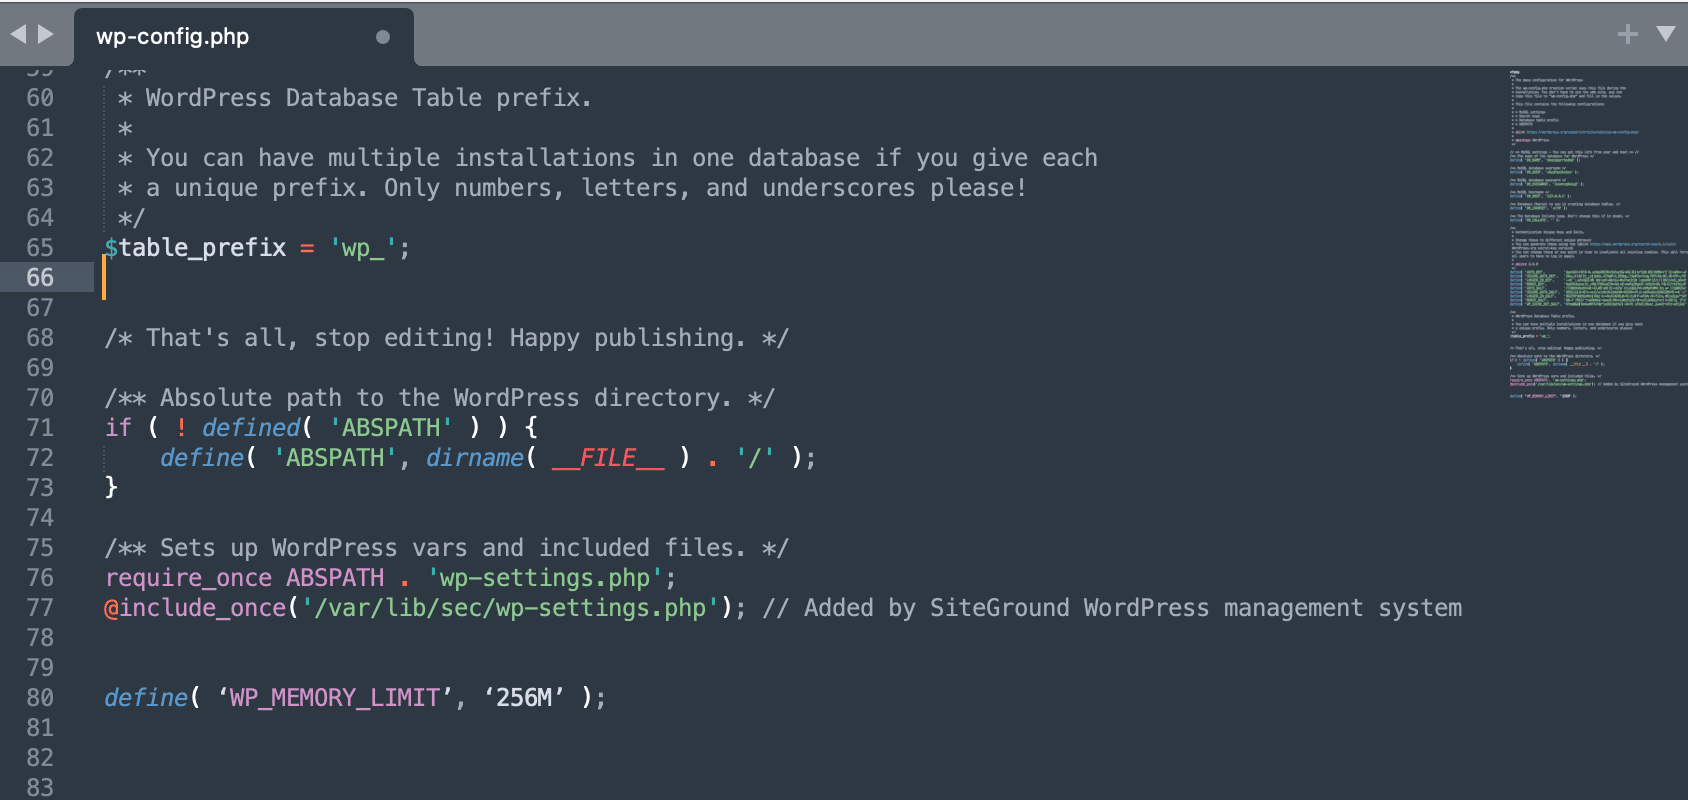
Search through the file until you find the line: define( ‘WP_MEMORY_LIMIT’, ‘256M’ ). Editing the number here will change the available memory on your site. You can go as high as 256MB, but in most cases, you won’t need this much memory.
If you can’t find the ‘WP_MEMORY_LIMIT’ line, you can also add a new one at the end of the file. However, be careful not to edit anything except the PHP memory limit line, as this is a sensitive file, and making other changes could potentially break your website.
2. Edit your .htaccess file.
Your second resort to increasing WordPress memory limit is to edit the .htaccess file. While it is accessible via the directory and file list returned by FTP connections, it is a hidden file and might be difficult to access. Since it is a secret file, the .htaccess file also begins with a “.” mark.
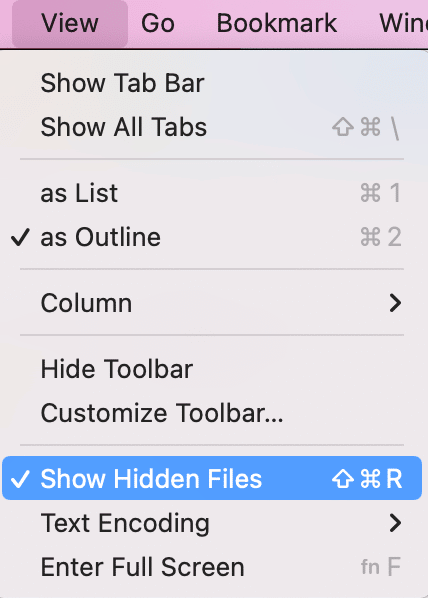
If you are struggling to locate the file, check to see if your SFTP file manager is keeping some files hidden from view. You can do this by navigating to the view menu and clicking on the “show hidden files” option as shown below.
Next, look for the file inside the public_html folder. It should look something like this:

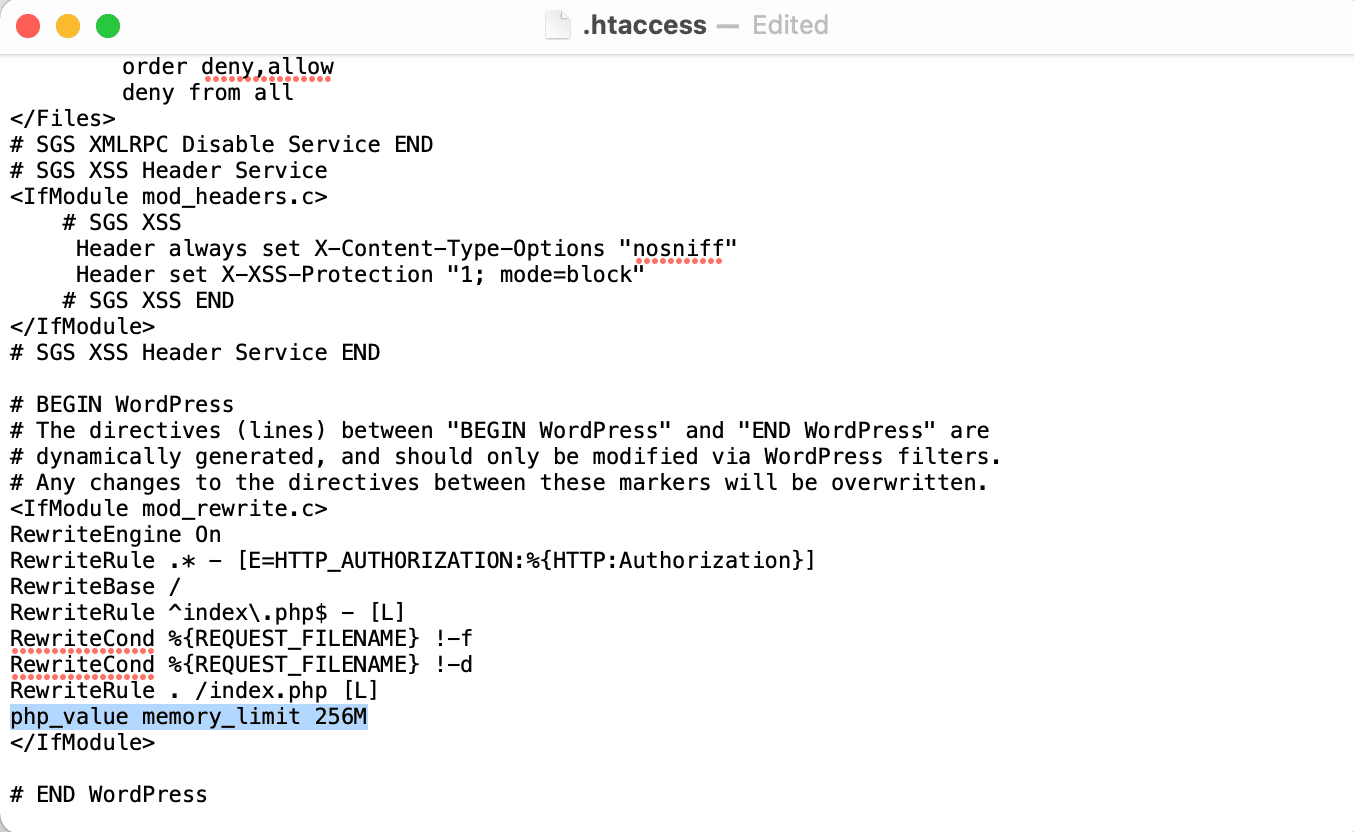
To start editing, open the .htaccess file and find the following line:
php_value memory_limit 256M
You can set the memory limit as high as you need. As already mentioned you can go up yo 256M but you’ll rarely need more than that.
If you can’t find it, just manually add the line and save the file.
Regardless of the file editing method you choose, make sure to clear your cache before checking to see if the problem is resolved.
3. Use a plugin to increase memory.
Another way to increase the memory of your WordPress site is by using a WordPress plugin designed for this purpose. There are a wide variety of them, but one you can consider is the WordPress WP Memory Limit, Memory Usage, Server Memory, and Health plugin.
This plugin works with WordPress version 5.2 or higher and lets you modify available PHP memory in a simple way, without having to access and manually modify your website’s files.
4. Contact your hosting provider.
Finally, you can improve your site’s memory by directly contacting your hosting provider and ask them to increase the PHP memory of WordPress. This may sound like the quickest solution but it is usually a service that is not included in most hosting plans so you might have to pay for it separately.
Other fixes for the “Allowed Memory Size Exhausted” error
Check Your Plugins
If you’ve already increased your PHP memory limit following the steps above and are still running out of memory, one of your plugins might be at fault. We always recommend keeping your site as light as possible and avoiding bulking up your site with unnecessary plugins. If you’ve already stripped down your site to the bare necessities, then consider checking your plugins one by one to make sure one of them isn’t causing the problem
The best way to tackle the issue is by disabling all of the plugins on your site and activating them one by one. This will help you easily identify the plugin causing the problem if any.
Use a new version of PHP
Outdated versions of PHP are generally slower and can process fewer tasks at once, which affects server memory usage and ultimately negatively impacts performance on your site. If you want to avoid memory usage errors on your site, make sure your site is running a new version of PHP and update to one of the latest versions if you don’t have one currently in place.
Resolving WordPress Memory Limit Issues
If you’re still getting WordPress Memory Limit errors, even after trying the recommendations above, we recommend getting your site checked out by a WordPress expert. Our team of WordPress ninjas can help you audit your site and advice you on the best possible solutions to optimize your WordPress installation’s performance.


