How to Use Elementor to Build WooCommerce Product Pages
On its own, WooCommerce allows you to build fully functional online store pages with many different features. However, default WooCommerce stores and product pages have limited design options. If you...
On its own, WooCommerce allows you to build fully functional online store pages with many different features. However, default WooCommerce stores and product pages have limited design options.
If you want your e-shop pages to be unique in their layout and design you will need to incorporate additional tools and options. Customizing basic WooCommerce pages on your own requires coding and can be complicated and time-consuming, which makes the use of page builders a convenient and effective option. Elementor, a popular page builder, is a good tool to help create custom-built product and shop pages with a wide range of design options.
In this post, we’ll show you how to build attractive and user-friendly pages for your WooCommerce business using the Elementor page builder.
Building A WooCommerce Product Page With Elementor
Using Elementor Templates
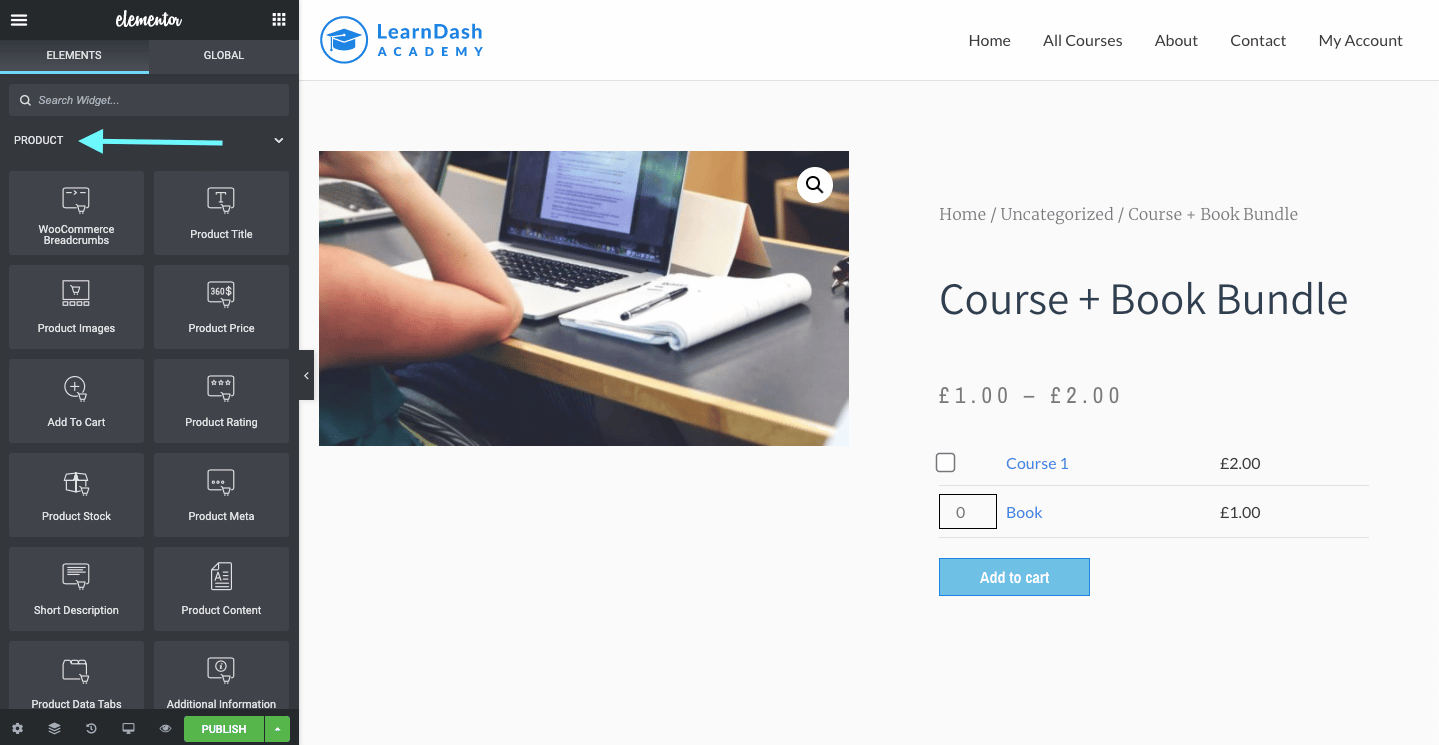
Elementor has created the WooCommerce Builder, available through Elementor Pro, to allow users to easily design single product and archive page templates with their Page Builder. The WooCommerce Builder includes access to pre-designed product page templates. These templates can easily be customized with your brand colors and other branding elements. Additionally, it includes a wide range of WooCommerce widgets you can use to create product pages and build your own templates from scratch.
To build a product page using the WooCommerce Builder with Elementor Pro, follow these instructions:
- Go to Templates from the dashboard under Elementor and select Add New.
- Select the Single Product option from the dropdown button.

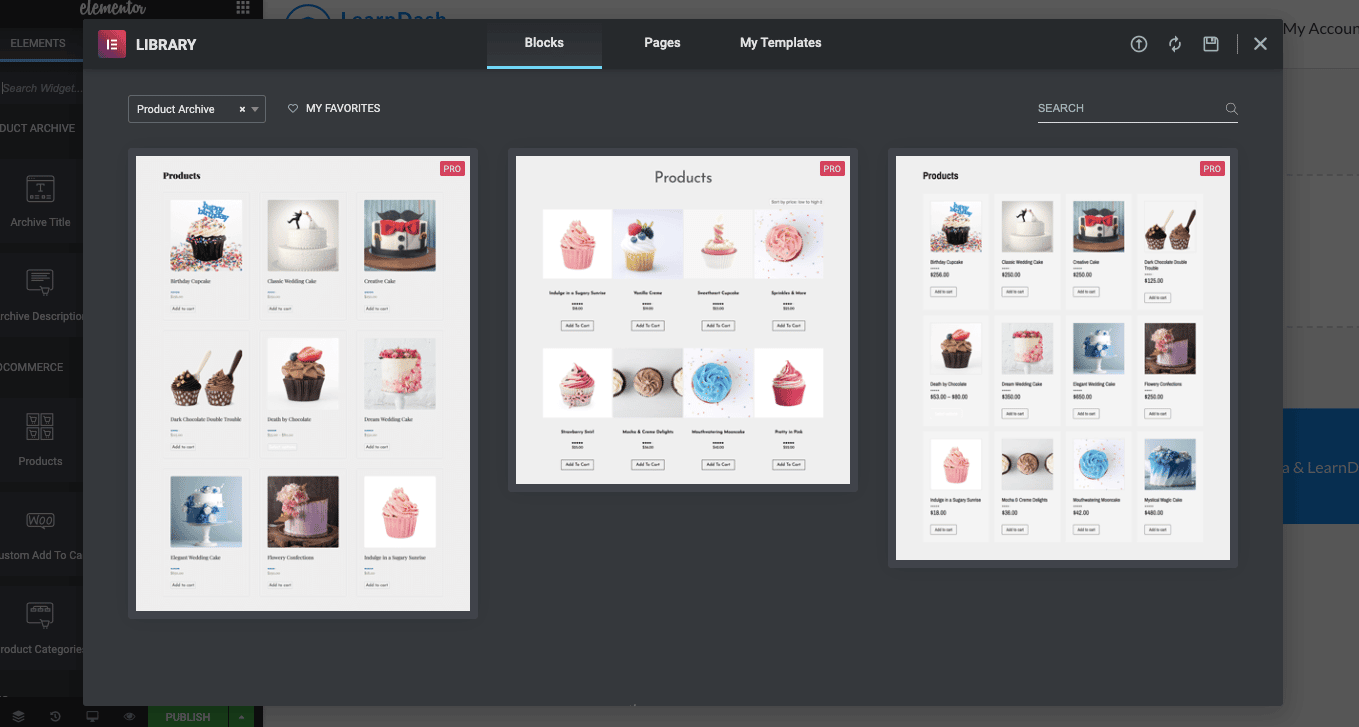
- Then choose a ready-made product page template and click on Insert.
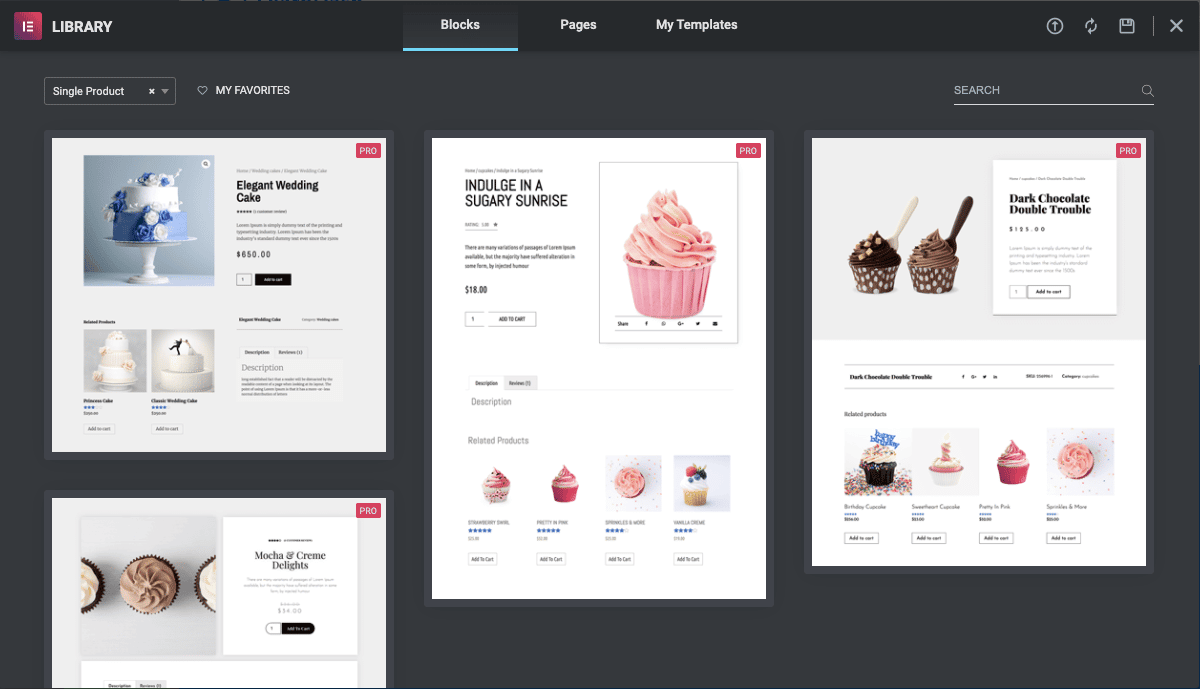
- Customize your product page by adding or removing widgets, and customizing each element’s characteristics such as color, typography, design, placement, etc. You can explore additional widgets and options on the left sidebar of the builder.
- Publish your new template.
In the next window, you’ll see the question “Where do you want to display your template?”. Click on “Add Condition” to determine when this template should be used. You can select “All Products” to use the template on all your product pages. You can also choose to use this template only for products within a category or with a specific tag.
Looking for a Ready-Made Solution?
Explore our WordPress, WooCommerce, and LMS plugins built to extend functionality without custom development.
Some users can experience trouble getting their custom design settings, such as font color and typography, to display when using Elementor. This can occur if you are using a WordPress theme that can control the appearance of your WooCommerce store. In some cases, your theme can override your custom page settings, so this is something to keep in mind if you experience this problem.
You can also select a blank page and build one from scratch with the product widgets for a fully customized look. To use a blank page simply close the template library pop-up when it appears and start building on the empty page. Some of the WooCommerce widgets you can use to build your product page include the custom “Add to Cart” button, “Product Price”, “Product Image”, and “Product Title and Description”. You can take a look at all of the different available widgets here. You can arrange the widgets according to your preference anywhere on the page layout and customize their style to match your desired look.
Building Product Archive Pages With Elementor
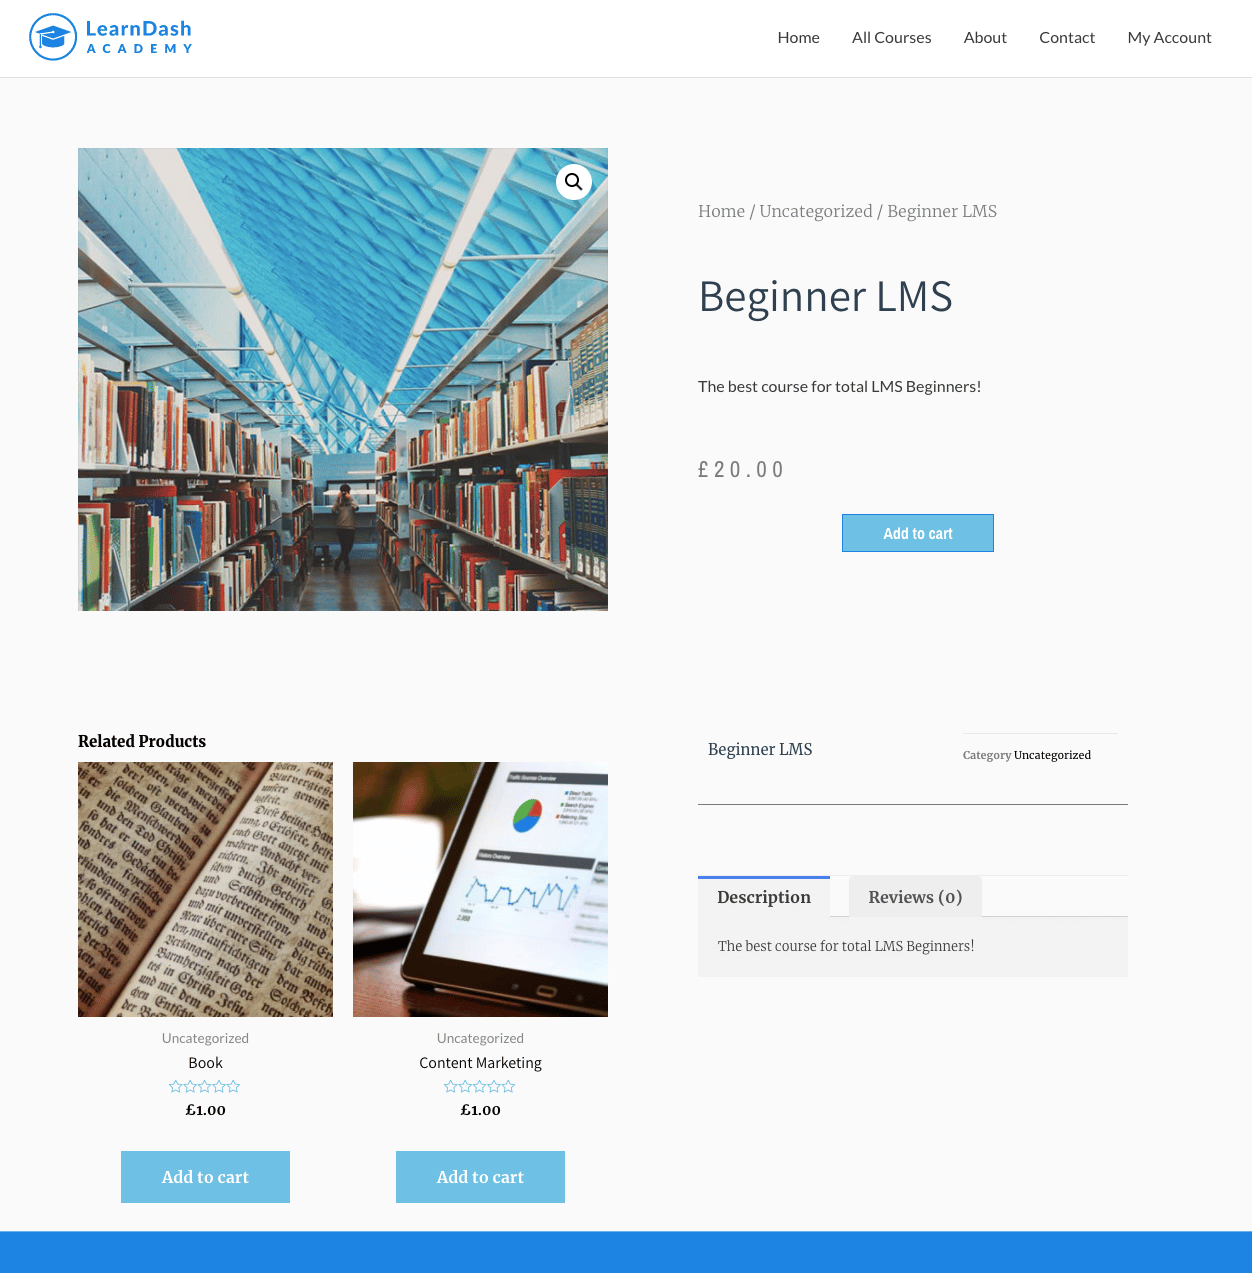
Besides single product pages to provide information and sell individual products, you’ll need to create attractive product archive pages to showcase your store offerings. The design of your shop page is extremely important since this will be the main point from where your online store visitors can browse through your products.
To build a product archive page using the WooCommerce Builder with Elementor Pro, follow these steps:
- Go to Templates and select Add New.
- Select Product Archive from the dropdown button and give your new template a name.
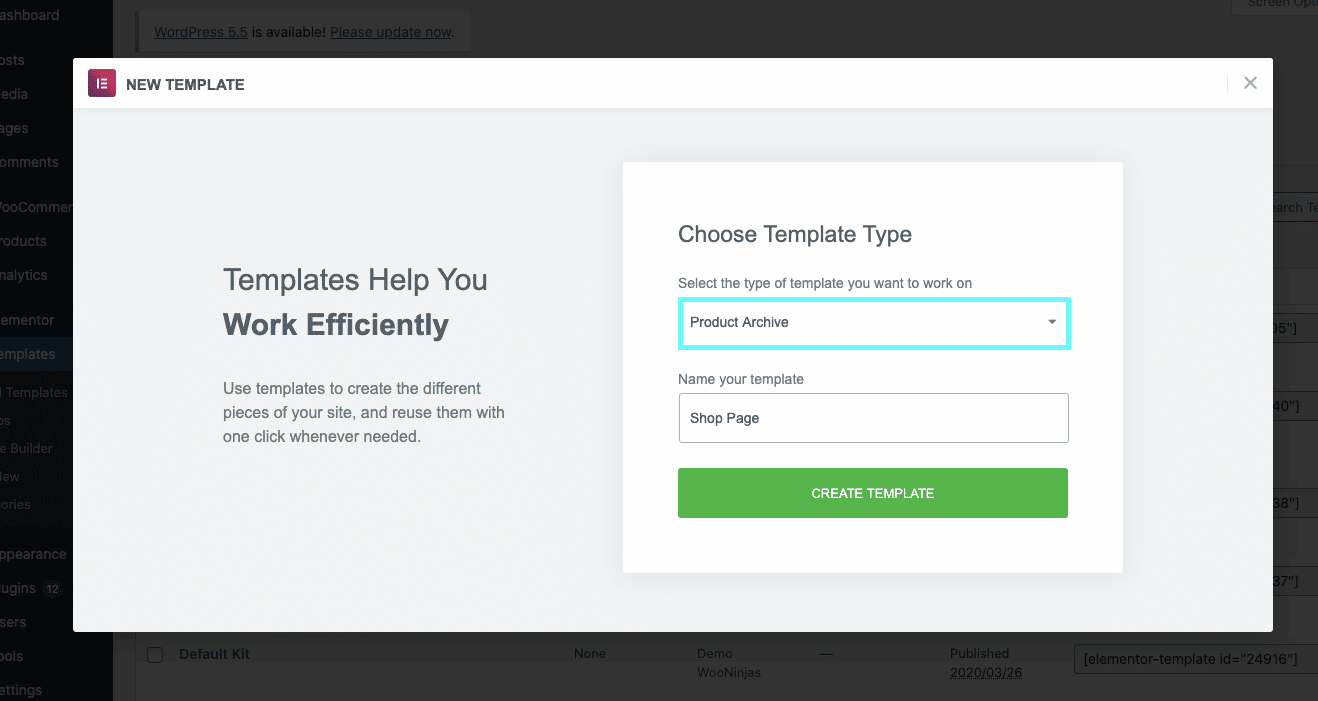
- Then choose a pre-made product page template to insert.
- Customize your product archive page. You can add or remove widgets, and customize each element’s characteristics such as color, typography, design, placement, etc. You can explore additional widgets and options on the left sidebar of the builder.
- Publish your new template.

In the next window, you’ll see the question “Where do you want to display your template?”. Click on “Add Condition” to determine when this template should be used. If you want your product archive page to be displayed on your main product page select Shop Page as a condition from the drop-down menu. You can also use product archive templates for your WooCommerce store’s product category pages.
Again, like with product pages, you also have the option to design your product archive page from scratch by starting your design with a blank page. Some of the WooCommerce widgets that are specifically useful to build product archive pages with the WooCommerce Elementor Builder include Archive Title, Products, and Product Categories among others. All together widgets can be arranged to create an aesthetic and user-friendly shop page.
Conclusion
Overall, Elementor Pro is a great tool for customizing your WooCommerce store pages. The page builder is easy to use and provides all of the necessary widgets and styling options to help you design custom product pages. We hope that this tutorial was helpful and provided the necessary information for you to customize your product and product archive WooCommerce pages using Elementor. Have you built WooCommerce pages using Elementor? Feel free to share below. We’d love to take a look.
Need Ongoing WordPress Maintenance & Support?
We handle updates, performance monitoring, security hardening, and technical fixes so your WordPress and WooCommerce site stays stable and secure.

BigCommerce is Shaking Up E-Commerce for WordPress
BigCommerce WordPress remains an actively supported, free, open-source solution that enables a true headless commerce setup. It combines the flexibility…
Read More...
WooCommerce Migration: How to Migrate to WooCommerce
Planning a WooCommerce migration? Learn the complete process, including steps, tools, and data types like products, orders, and customers
Read More...
Effective B2B Marketing Strategies for WooCommerce Sites
Boost your B2B WooCommerce success with proven marketing strategies, including SEO, email campaigns, and wholesale optimization.
Read More...