With the LearnDash Course Import/Export add-on, creating, updating, migrating, and backing up courses has never been this easy! Export courses into a .xls or .xlsx file with a single click. Plus, create and edit courses, lessons, and topics directly from a simple template, importing them into any LearnDash site in record time.
Below, you’ll find the instructions you need to follow to install, configure, and import/export courses with this add-on.
Video Tutorial
Watch the tutorial video below for a quick walkthrough of the add-on’s features and setup process.
For detailed instructions, please continue reading the full documentation. If you still have any questions, feel free to submit a support ticket.
Installation
- Install the LearnDash LMS plugin & activate it
- Install LearnDash Course Import/Export and activate it
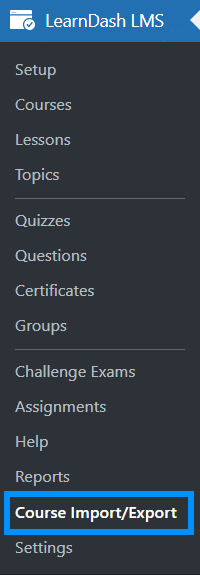
- A new Course Import/Export menu will appear under the LearnDash LMS menu
Activate Your License Key
You can activate your license key from the License Settings tab, located under the main Course Import/Export menu.
Steps to Activate the License
- Open the License Settings tab in the Course Import/Export menu.
- Locate the license key field.
- Enter the license key that was sent to your email after purchasing the add-on.
- Click the Activate button to complete the activation process.

General Settings
To configure the add-on’s settings, select Course Import/Export from the LearnDash menu on the WordPress dashboard. You will find all setting options under the General Settings tab.

Minimum role to Import courses
This setting allows you to define the minimum user role required to access the course import/export functionality. You can choose from the following WordPress user roles:
- Administrator
- Editor
- Author
The selected role determines which users can access the add-on submenu in the WordPress admin dashboard.
Administrator
If the Administrator role is selected, only Administrators will be able to access the add-on submenu in the WordPress backend.
Administrators will have full access to all add-on tabs and settings.
Editor & Author
If the Editor role is selected, Administrators and Editors will be able to access the add-on submenu.
If the Author role is selected, Administrators, Editors, and Authors will be able to access the add-on submenu.
In both cases:
- Administrators will continue to have full access to all add-on tabs.
- Editors and Authors will only have access to the following tabs:
- Import Course
- Debug Logs (only if the “Enable Debug Logs” option is enabled by the Administrator)
- System Information (only if the “Enable Debug Logs” option is enabled by the Administrator)
Publish Courses on Import
Enable this toggle if you want imported courses to be published automatically. By default, all imported courses will be set to Pending status.
Update duplicate lessons or Topics on Import
Enable this toggle if you want the system to update existing lessons and topics during the import process. When this option is active, any matching lessons or topics will be updated instead of creating duplicate entries
Check for existing featured images on Import
Enable this option to check whether a featured image already exists in the database from previous imports. This helps prevent duplicate image uploads. However, enabling this option may slow down the import process.
Enable Debug Logs
Enabling the “Enable Debug Logs” toggle in the general settings tab allows the system to generate import/export debug logs, which offer valuable information and insights for troubleshooting any potential issues.
Once Debug logs are enabled, two new tabs will appear: “Debug logs” and “Systems Information“. The “Debug logs” tab displays detailed logs that provide a comprehensive overview of the user’s process, while the “System Information” tab showcases your system specifications.


Enable Google Sheet Compatibility
Here, you can enable this option to import courses from a Google Sheet.
Google Sheet Schedule
Here, you can select the Google Sheet import schedule. Based on the interval, a cron job will run and create/update the LearnDash courses, lessons, and topics based on the columns and records in the Excel sheet. You can select from the following options:
You can choose from the following scheduling options:
- Every minute
- Once Hourly
- Twice Daily
- Once Daily
- Once Weekly
Google Sheet import
Here, you are supposed to provide the Google sheet import link from which you want to check and import/update the LearnDash Course-related information.
The Google Sheet URL should be in the following format:
https://docs.google.com/spreadsheets/d/<your-spreadsheet-id>/edit#gid=<sheet-id>
To create your own LearnDash Course Importing Google sheet, the steps are as follows:
1- Navigate to the Import Course tab and click the Copy Template to Google Sheet button. This will prompt you to create a copy of the course import template in your Google account.

2- Click the Make a copy button to create your own editable Google Sheet.
3- Once the sheet is created, click the Share button and set the access permissions to Restricted with Viewer access enabled for shared users.

4- Click the Copy link button to copy the Google Sheet URL.
5- Navigate back to the General Settings tab, paste the Google Sheet URL into the Google Sheet Import field, and click the Update Settings button to save the changes.
Import Google Sheet Now
Here, you can click the Import Now button to manually run the Google Sheet import process. Once executed, the add-on will import or update LearnDash courses, lessons, topics, and related content based on the data available in the connected Google Sheet
After the import process is completed, the latest course-related information and content will be updated on your website.
Export a Single Course
Navigate to LearnDash LMS > Courses in the WordPress admin dashboard. You will see three export buttons available for each course:
- XLS
- XLSX
- JSON
- DOCX
To export a course, simply click the desired export button. The course file will be downloaded in the selected format.
The exported file includes both the course content and course settings, which can later be imported into another LearnDash website using this add-on.
In the case of the DOCX, the file will contain the respective course, lesson, and topic content.

Export Multiple Courses
To export multiple courses into a single file, navigate to LearnDash LMS > Courses and select the courses you want to export.
After selecting the courses, choose one of the following options from the Bulk Actions dropdown:
- Export Course as XLS
- Export Course as XLSX
- Export Course as JSON
- Export course as DOCX
Finally, click the Apply button.
The selected courses, including their content and settings, will be downloaded as a single .xls or .xlsx file. This file can later be imported into another LearnDash website using this add-on. In the case of DOCX, a zip file will be exported containing the individual course’s DOCX files. The DOCX files will contain the respective course, lesson, and topic content.

Import a Single Course
To import a course, navigate to the Import Course tab under the Course Import/Export menu in the main LearnDash LMS section
Follow these steps to complete the import process:
- Click the Browse button to select your completed .xls or .xlsx course template file.
- After selecting the file, click the Next button.
- The system will process the file and import the course into your LearnDash site, including its content and settings.

Import Multiple Courses
You can import multiple courses at once using a single template file.
.Step 1: Prepare the Template File
- Add multiple course entries in the “Courses” sheet of the template.
- For lessons and topics, assign them to the correct course by entering the course title in the “Course” column within the “Lessons” and “Topics” sheets.
Step 2: Upload the File
- Go to the Import Course tab under the Course Import/Export menu in the LearnDash LMS section.
- Click the Browse button and select your .xls or .xlsx file containing multiple courses.
- Click the Next button to start the import process.
Step 3: Review and Publish
- After import, a list of all imported courses will be displayed.
- Select a specific course to configure its settings.
- Once configured, publish the course to make it live.

Import Course(s) in JSON Format
You can import single or multiple courses at once using a single JSON file.
Step 1: Upload the File
- Go to the Import JSON tab under the Course Import/Export menu in the LearnDash LMS section.
- Click the Browse button and select your JSON file containing multiple courses.
- Click the Next button to start the import process.

Step 2: Review and Publish
- After import, a list of all imported courses will be displayed.
- Select a specific course to configure its settings.
- Once configured, publish the course to make it live.

Note: It is recommended that only technical people, such as developers, with in-depth knowledge of LearnDash tables, their fields, and their respective fields’ options, use this option. There is no template file provided for JSON importing because it is not human-readable for a non-technical person. This option is only provided to import/export a large number of courses. If you wish to create and edit your courses, lessons, and topics, then use another option, such as an Excel template file.
Import Course(s) in DOCX Format
You can import a single course at once using a single DOCX file.
Step 1: Upload the File
- Go to the Import DOCX tab under the Course Import/Export menu in the LearnDash LMS section.
- Click the Browse button and select your DOCX file containing a single course.
- Click the Next button to start the import process.

Step 2: Review and Publish
- After import, the imported course’s name will be displayed.
- Select the respective course to configure its settings.
- Once configured, publish the course to make it live.
Note: This feature is compatible with “Publish courses on import” and “Update duplicate lessons or topics on import” options in the “General Settings” tab.

LearnDash Course Import/Export Template Guide
Click here to view the complete template guide, including column details.
FAQs
Does the Add-on support all course types (pricing) present in LearnDash?
Yes. The add-on supports all LearnDash course types, including the recurring course type as well.
Which Excel extension does this add-on support?
This add-on supports the .xls and .xlsx file extensions.
Where can I find the standard XLS template?
The plugin zip file includes a standard XLS template for import. The standard XLS template is located inside the zip file provided here: learndash-course-import-export > sample-import-files.
How can I export a course?
To export any course, you have to go to the “Courses” page under the LearnDash LMS menu. Next, click on the “Export” button located in the “Course Export” column.
Can I export lessons and topics without exporting an entire course?
Currently, the add-on only supports exports for complete courses.
Can I import or export multiple courses at a time?
Yes, the add-on supports imports and exports for multiple courses.
Will the course, lessons, and topics be successfully imported if the Shared Course Steps are enabled from the course settings?
Yes, you can successfully import and export the courses with the “shared course steps” option enabled.
Why does the course’s import progress bar get infinitely stuck?
The import progress bar might get stuck when importing a large number of courses at once. To resolve this issue, please contact your hosting provider and ask them to apply the following changes to server configurations:
- upload_max_filesize = 32M
- post_max_size = 48M
- memory_limit = 256M
- max_execution_time = 600
- max_input_vars = 1000
- max_input_time = 400
If a course, lesson, or topic has text, images, and a video lesson, how are these added to the spreadsheet, and how would one control formatting/appearance?
Images and videos can be added using HTML tags. <img> for the images, <p> for text and <video> and for the videos. Using these tags, you can add images and videos along with the text.
How does your addon handle the order of Courses, Lessons, and Topics? Can You Provide An Example Of How This Works?
Our addon maintains the order in which Courses, Lessons, and Topics are created, irrespective of how they are structured in the course builder. For example, if Lesson 2 is created before Lesson 1 on your website, the export sequence will be Lesson 2 followed by Lesson 1.
Why do you recommend that admins review their content before importing it to a second site?
We recommend that admins review their content before importing for a specific reason. The content export order is determined by the creation order, not the order in the course builder. By doing this review, it ensures that admins are well-informed about the content sequence and how it will be imported into the second site.
Can we rearrange the lessons in a specific order?
Certainly! You have the flexibility to arrange lessons in your preferred order by manually moving them up or down within the exported sheet before you begin the import process.
How can we easily identify the order of lessons?
You can identify the order by examining the “ID” column in the export file, which provides a clear reference for each lesson’s position.
What happens if I import a course without enabling the addon’s “publish” toggle, and later, upon publishing, the status of its lessons and topics remains pending?
It’s important to note that when a course is imported as pending, along with its lessons and topics, the default behavior of LearnDash is to maintain the pending status even upon publishing. To address this behavior and ensure proper import, follow these steps:
- Make sure the course you plan to import is not already present on your site. If it is, delete this course along with its existing lessons, topics, and then empty the trash as well.
- Enable the “Publish Courses on Import” option in the General Settings of our addon.
- Proceed with importing your course using our addon.
By following these steps, all course content, including lessons, should be published upon the initial import, preventing any pending status.
Does LearnDash Course Import Export support any page builder?
Our addon supports import and export with Elementor and Beaver Builder for the generic blocks only. To edit the Elementor content from the sheet, you can update it within the “_elementor_data” column, and to edit the Beaver Builder content, you can modify the “_fl_builder_data” column.
Can we also import/export the LearnDash Quizzes with this add-on?
This add-on is designed specifically for importing and exporting Courses, Lessons, and Topics. To manage quizzes, please use our LearnDash Quiz Import Export add-on.
What happens if the destination site already has the same course, lesson, or topic ID during import?
When importing courses, lessons, or topics, the system generates new database entries for each item with unique IDs. This ensures that all internal relationships (such as which lessons are linked to which course) are correctly updated during the import process. As a result, IDs are automatically regenerated to avoid any conflicts between the source and destination sites.
If I update the Course, Lesson, or Topic title in the import sheet and import it again, will it update the existing content or create a new one?
If you modify the Course, Lesson, or Topic title in the import sheet and re-import it, the system will treat it as a new item and create a duplicate entry, even if the “Update duplicate lessons or Topics on Import” option is enabled.
To update existing content, never change the Title of the Course, Lesson, or Topic in the import sheet when re-importing. Changing the title will prevent the system from matching it with the existing course structure.
Changelogs
1.5.2
- New: Added DOCX course export options for single and bulk course exports.
- New: Added DOCX import support with a dedicated admin import tab and DOCX file validation.
- New: Added compatibility with Blocks editor in DOCX file export/import.
1.5.1
- Fix: Preserved decoded HTML entities in imported course, lesson, and topic titles.
- Fix: Improved existing content lookup by normalizing title comparisons and falling back to slug matching.
1.5.0
- New: Added JSON course export options for single and bulk course exports.
- New: Added JSON import support with a dedicated admin import tab and JSON file validation.
- Fix: Improved duplicate import handling for existing course content and relationships.
1.4.14
- Fix: Set duplicate imports to update existing courses by default, including activation-time settings backfill.
1.4.13
- Fix: Updated admin default tab behavior for non-admin users to open the import tab.
- Fix: Fixed featured image import flow by reusing existing images when enabled and removing debug logging.
1.4.12
- Fix: Addressed security vulnerabilities and improved overall plugin security.
1.4.11
- New: Added Google Sheet integration allowing automatic data imports at scheduled intervals.
- Fix: Resolved an issue where course settings were not being updated.
1.4.10
- Fix: Fixed an issue preventing proper validation of Excel files before import.
1.4.9
- Fix: Fixed the LearnDash lesson and topic linking issue.
1.4.8
- Fix: Fixed the LearnDash course sorting issue.
1.4.7
- Fix: Fixed duplicating images in media library.
1.4.6
- New: Minor Ui Changes.
1.4.5
- Fix: Added php spreadsheet library v1.18.0 for backward compatibility.
1.4.4
- Fix: Updated php spreadsheet library to v1.29.6.
- Fix: Removed depreciated function get_page_by_title.
- New: Search existing featured image in database on import.
1.4.3
- New: Course import export with beaver builder addon support.
1.4.2
- Fix: Import Export courses with special characters in names.
1.4.1
- Fix: Shared course steps attachment on course import.
1.4.0
- New: Course import export with Elementor support.
1.3.5
- Fix: Title issues due to special characters.
1.3.4
- New: Update PHP spreadsheet library 1.18.0
1.3.3
- Fix – Update existing course status.
- Fix – Update existing lessons and topics.
1.3.2
- Fix – Course import when shared course steps enabled.
- Fix – Export all lessons.
1.3.1
- Fix – Duplicate images upon import.
1.3.0
- Fix – Addressed issues with plugin logging settings.
- New – Added button to clear logs under logs tab.
1.2.9
- New – Added support for additional LearnDash course fields during import/export.
- New – Improved the plugin’s user interface to enhance the overall user experience.
- New – Implemented a logging system to track activities performed with the addon.
- Fix – Resolved issues related to the association of lessons and topics during the import process.
- Fix – Addressed minor problems and warnings within the plugin.
- Fix – Updated the Excel template used by the plugin.
- Fix – Enhanced the codebase and optimized its performance.
1.2.8
- New – Update duplicate lessons/topics option is added in plugin settings.
- Fix – Plugin documentation link updated.
- Fix – Recurring courses values on import/export.
- Fix – Issues with exporting data into wrong column.
- Fix – Change format of prerequisite courses from course ID to course names on import/export.
- Fix – Resolved lesson and topics association issue when shared course steps option is enabled.
1.2.7
- Fix – Compatibility issue with PHP version 8.
- Fix – Resolved lesson and topics association issue when the shared course steps option is enabled.
1.2.6
- Fix – Resolved topics association issue with course and lesson on import.
- Fix – Added plugin settings description.
1.2.5
- Fix – Course and Quiz linking.
- Fix – Resolved import/export problems related to shared course steps.
- Fix – Improved the user interface and experience of the plugin settings page.
- Fix – Upgraded the Excel template used in the plugin.
1.2.4
- Fix – Course duplication issue.
- Fix – Issues with categories and tags.
- Fix – Editor / Author LearnDash menu setup.
- New – Added setting for publishing course on import.
1.2.3
- New – Import/Export tags for courses/lessons/topics.
- Fix – UI Improvements.
1.2.2
- New – Added settings for the minimum role to import courses.
1.2.1
- New – Added support for shared course steps in Import/Export.
1.2.0
- New – Import/Export category and featured image for courses / lessons / topics.
1.1.1
- Fix – Courses, Lessons, and Topics order of list after import.
1.1.0
- New – Import/Export course, lesson, and topic settings.
1.0.2
- Fix – Export button UI on course listing page.
1.0.1
- Fix – License issue.
- Fix – Minor issues.
1.0.0
- Initial Release.
