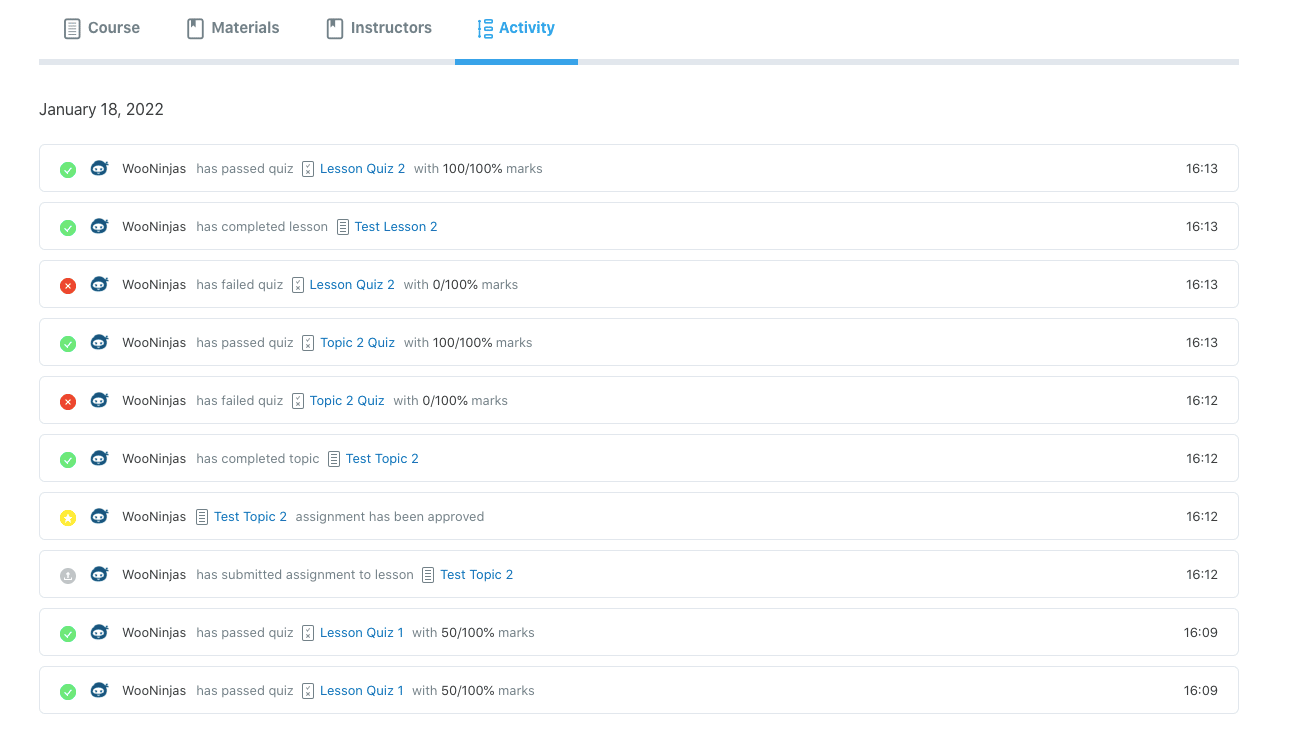
The LearnDash Activity Timeline add-on allows you to showcase a list of your students’ latest course activities in chronological order. This activity stream is conveniently displayed on its own tab on the course page.
Instructors can use the activity feed to monitor their students’ engagement and participation in the course. At the same time, students can keep tabs on their peers and their progress. Below, you’ll find the instructions to install and configure the LearnDash Activity Timeline Add-on.
Table of Content
- Installation
- License Settings
- Activity Shortcode
- Select Activities For The Activity Timeline
- Set The Number Of Activities To Display Per Page
- Frontend
Installation:
- Install and activate the LearnDash plugin.
- Install and activate the LearnDash Activity Timeline Add-on.
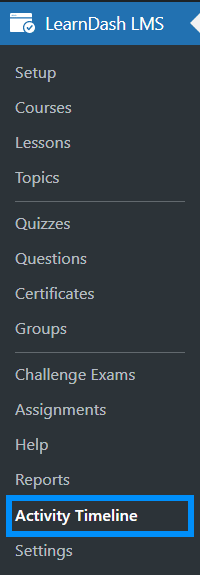
- A new “Activity Timeline”sub-menu will be added to the LearnDash menu.
Activate Your License Key:
The license key can be configured from the “License” tab, found on the Activity Timeline menu. License keys will be sent to your email address when you purchase the add-on. Insert your license key in the field and then click on Activate.

Activity Shortcode
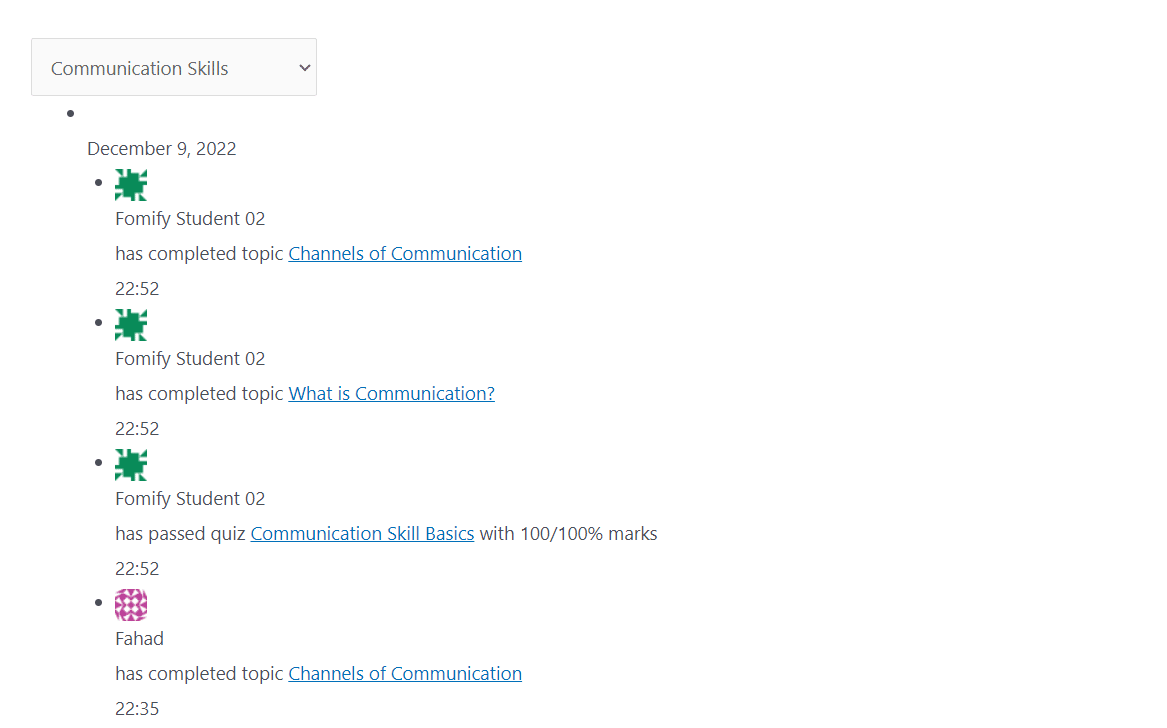
To display the activity of specific courses, you can place the activity shortcode on any website page. This shortcode will show a dropdown and from there you can select the course for which you want to show the activity.

Here’s how the Activity Timeline shortcode will look on the front end:
Select Activities For The Activity Timeline
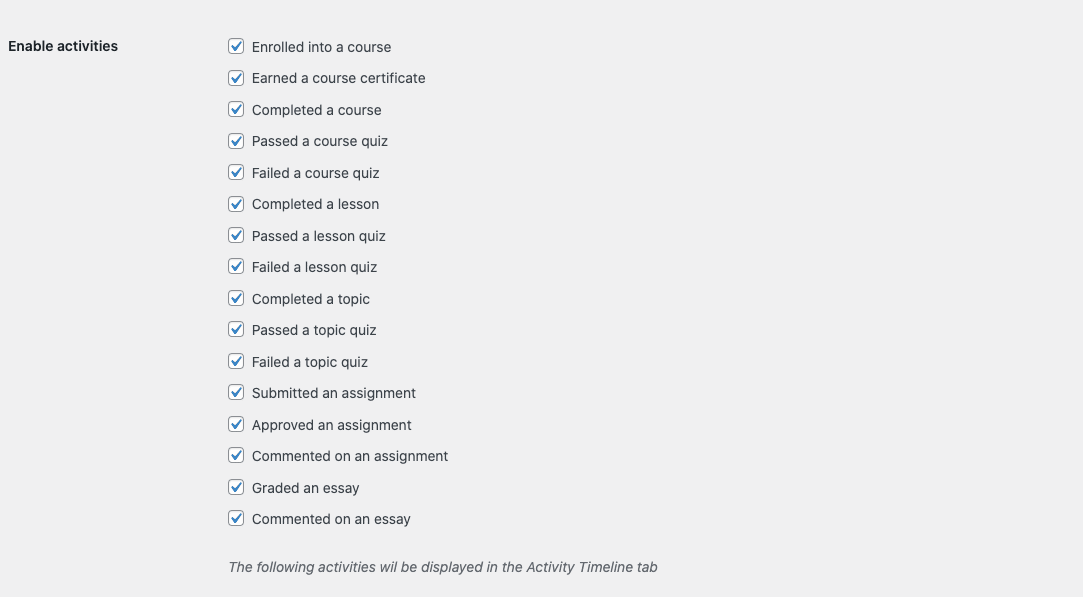
The add-on allows you to select which specific learning activities you want to be registered for and displayed on your courses’ Activity Tab. You can do this directly from the Activity Timeline menu from the “General” tab.
Here are the types of activities you can showcase using the LearnDash Activity Timeline:
- Enrolled in a course
- Earned a course certificate
- Completed a course
- Passed a course quiz
- Failed a course quiz
- Completed a lesson
- Passed a lesson quiz
- Failed a lesson quiz
- Completed a topic
- Passed a topic quiz
- Failed a topic quiz
- Submitted an assignment
- Approved an assignment
- Commented on an assignment
- Graded an essay
- Commented on an essay
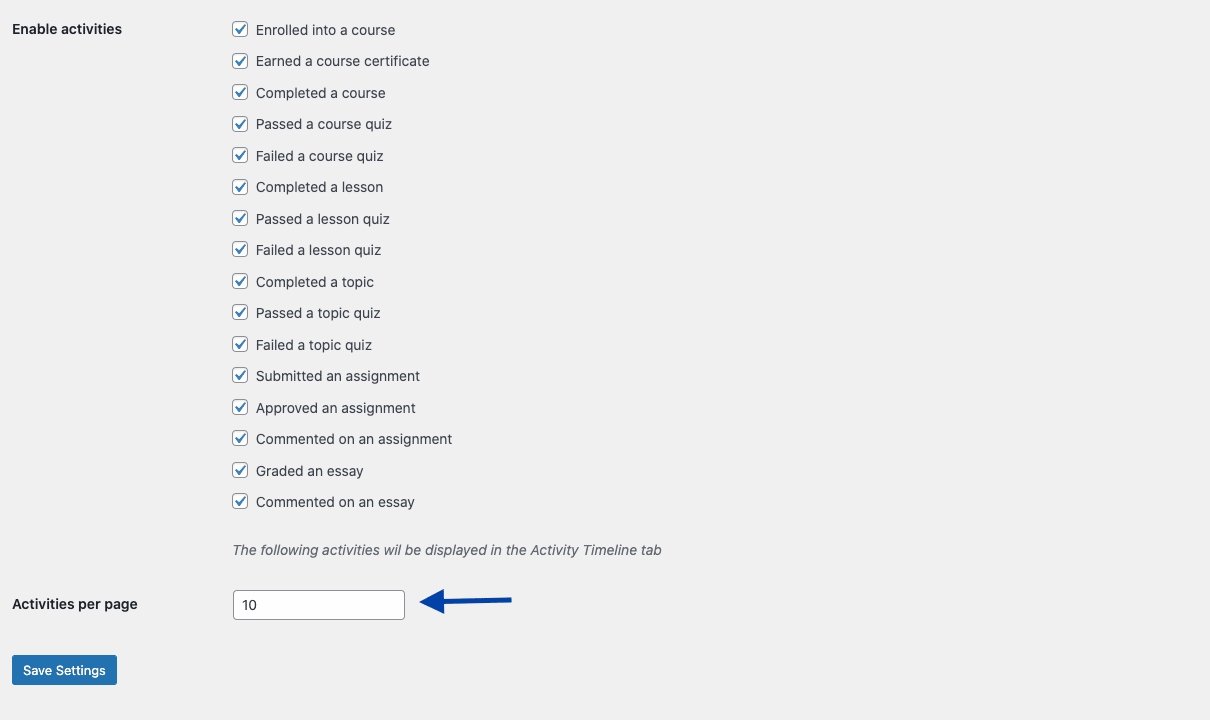
To display an activity type on the timeline, simply enable the option by checking the box next to each item. If you wish to omit a certain type of activity from the timeline, simply uncheck the box next to that option. Finally, save your settings.
Set The Number Of Activities To Display Per Page
You can customize how many items you want to display on each page of the Activity Timeline from the “General” tab on the Activity Timeline menu. Simply set the number of activities to display per page on the corresponding field, located at the bottom of the page, and save your settings.
Frontend:
