Attendance can be marked by students themselves or by administrators and group leaders only, based on your preference. All student attendance data can also be accessed through complete attendance reports, which can be filtered according to your needs.
Video Tutorial
Watch the tutorial video below for a quick walkthrough of the add-on’s features and setup process.
For detailed instructions, please continue reading the full documentation. If you still have any questions, feel free to submit a support ticket.
- Video Tutorial
- Installation
- License Settings
- General Options
- Restrict IP
- Enable Filtered Mark Attendance
- Enable Admin Mark Attendance
- Delete Attendance Data On Uninstall
- Enable Automatic Attendance on Login
- Disable mark attendance for users
- Show absent of unmarked days in reports
- Enable attendance report send to user's email
- Send attendance report – Weekly/Monthly
- Attendance Display Format
- Allow Selected User Roles to Mark Attendance
- Auto Mark Progress On Attendance
- Enable Activity Logs
- Enable debug Logs
- Messages
- Restrict IP Message Alert
- Attendance Logs
- Time Logs
- Mark Attendance By Users:
- Mark Attendance By Courses:
- Help
- Disallow Attendance
- Restrict Attendance Timeframe
- Attendance Summary
- Gradebook by LearnDash
- FAQ's
- Changelogs
Installation
- Install the LearnDash plugin & activate it.
- Install and activate the LearnDash Attendance Add-on.
- After activation, the “Attendance” sub-menu will be added under the LearnDash menu.
License Settings
The license key is configured on the License Option tab of the LearnDash Attendance Settings. License keys are delivered by email after the purchase of the add-on.
Enter the license key in the corresponding field and click on Activate.

General Options
To locate the general settings for this add-on: Navigate to LearnDash LMS, click on the “Attendance” sub-menu and select the “General Option” tab.

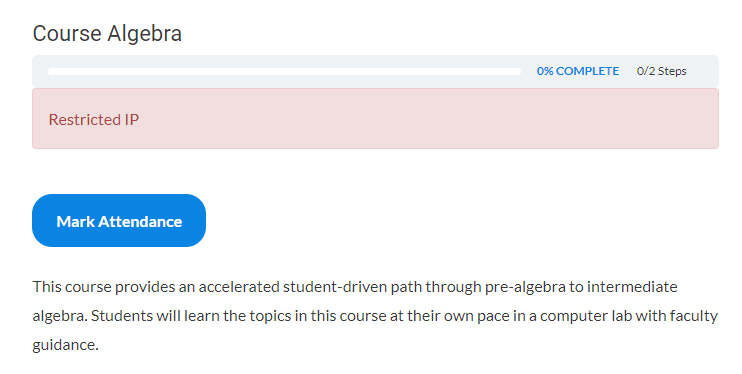
Restrict IP
When this option is enabled, students will only be permitted to mark attendance from a single static IP address. A “Restricted IP” message will be displayed if students mark their attendance from a different IP address.
Enable Filtered Mark Attendance
When this option is enabled, a new filtered mark attendance tab, “Mark Attendance By Courses” will be available in the attendance settings.
Enable Admin Mark Attendance
If enabled, only users with Admin and Group Leader roles will be able to mark attendance for students.
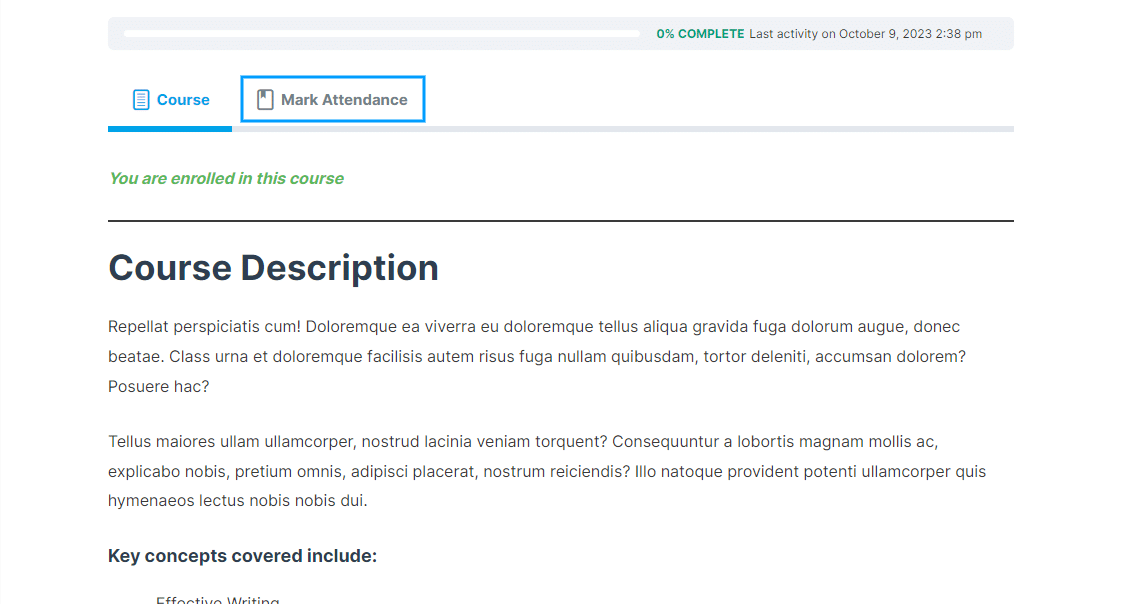
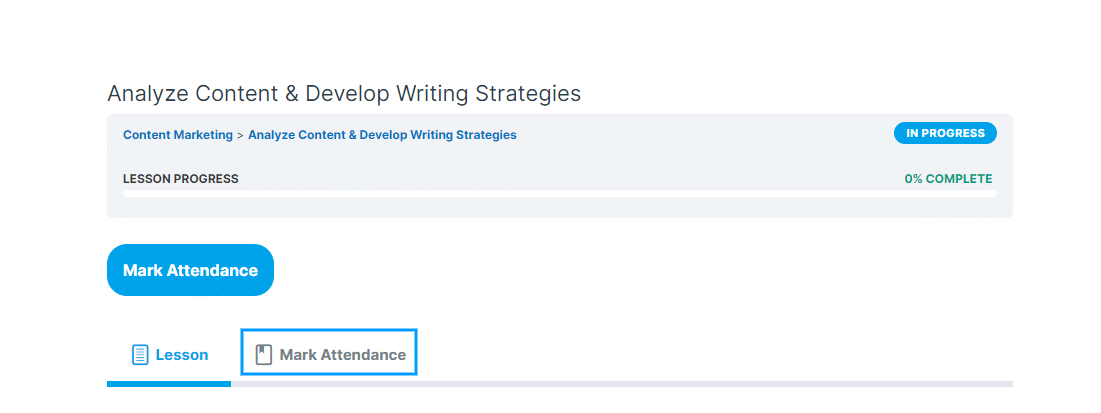
A “Mark Attendance” tab will be added to the course, lesson, and topic pages, but will only be visible to Admin and Group Leaders.
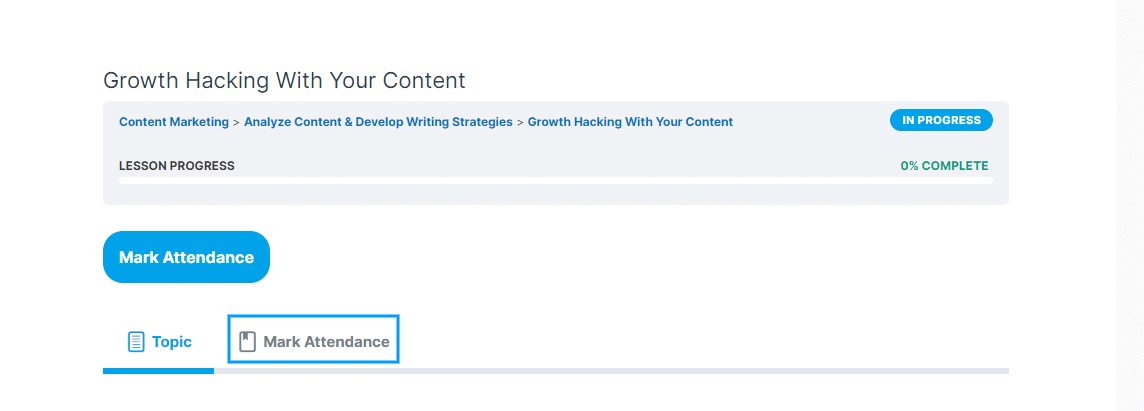
To mark attendance for students as an Admin or Group Leader, follow these steps:
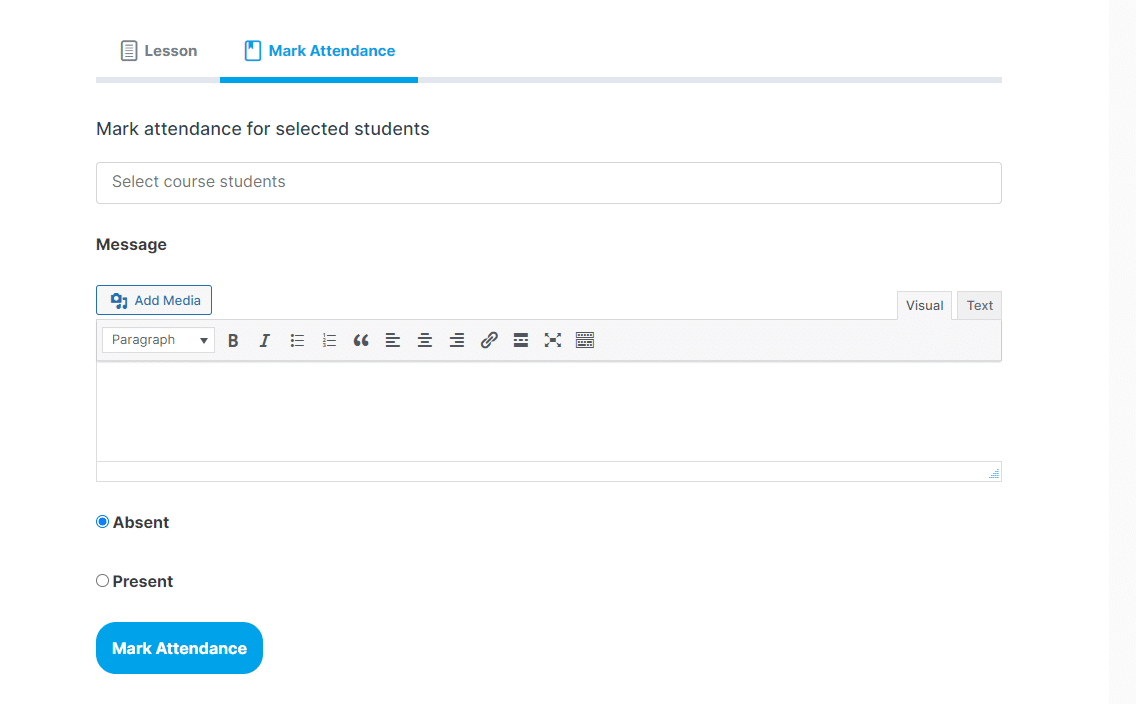
- Click on the “Mark Attendance” tab and go to the “Mark attendance for selected enrolled students” field.
- Select enrolled students.
- Select the Present or Absent option.
- Click the “Mark Attendance” button.
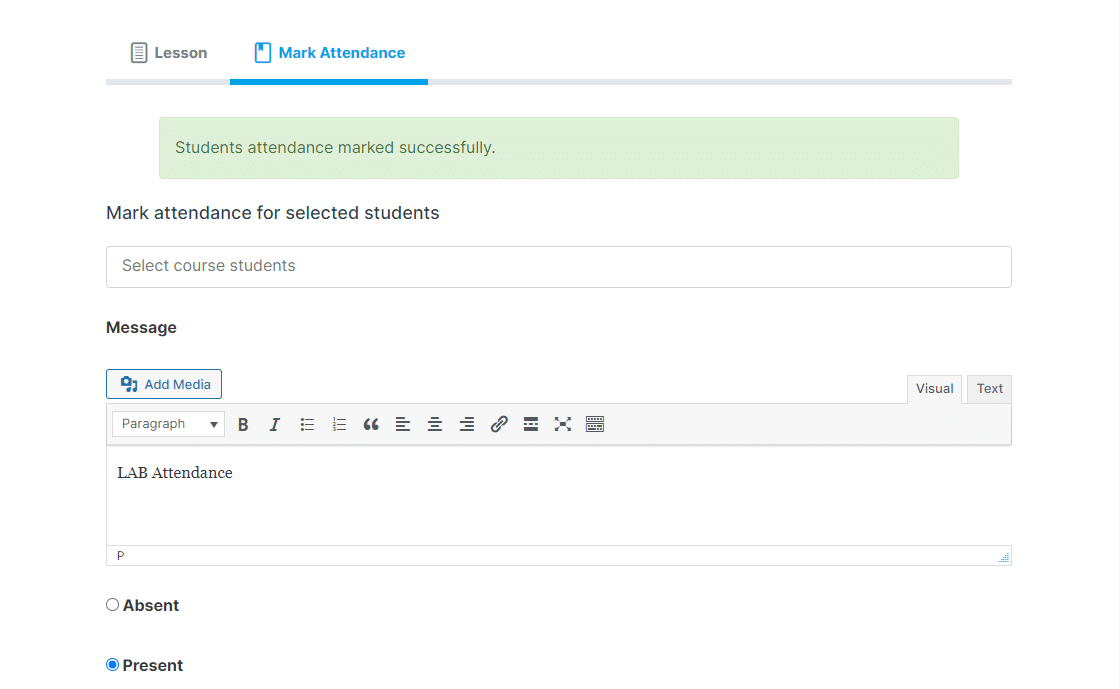
After clicking the “Mark Attendance” button, the message “Students attendance marked successfully” will be displayed.
Admins and Group Leaders can mark attendance for multiple students simultaneously. Keep in mind that Group Leaders can only mark attendance for students who are members of their group, whereas Admins can mark attendance for all students.
Delete Attendance Data On Uninstall
Enabling this feature will result in the deletion of all course and user attendance data when the add-on is uninstalled.
Enable Automatic Attendance on Login
Enabling this option will automate the attendance marking for all courses a user is enrolled in upon their login.
Disable mark attendance for users
By enabling this option, the users won’t be able to mark their attendance from courses lesson, and topic pages. Only group leaders and admins will be able to mark the attendance for students.
Show absent of unmarked days in reports
When this option is enabled, unmarked attendances will be marked as “absent” in the attendance logs and reports.
Enable attendance report send to user’s email
If this option is enabled, users will receive emails with their attendance reports.
Send attendance report – Weekly/Monthly
This option allows you to select the frequency at which attendance reports will be sent to your students.
- If the “Weekly” option is selected, email reports are sent every Friday.
- If the “Monthly” option is selected, then email reports will be sent on the last day of every month.
Attendance Display Format
Here, you can select whether attendance data is displayed in numbers or percentages in the email reports.


Allow Selected User Roles to Mark Attendance
Here, you can allow different user roles to mark students’ attendance.
Auto Mark Progress On Attendance
When this option is enabled, whenever a student, administrator, or group leader marks attendance for a course, its lessons, and topics (along with their quizzes) will not be marked as complete, but the respective course’s quizzes will be marked as completed only.
If the student, administrator, or group leader marks the attendance of a respective lesson, its corresponding topics and quiz will also be marked as complete. The student will see 100% complete progress on the respective lesson page.
Similarly, if the student, administrator, or group leader marks the attendance for a topic, its corresponding quiz will be marked as complete. The student will see 100% complete progress on the respective topic page with regard to the individual topic (if the lesson has a single topic). If the lesson consists of multiple topics, the complete progress % (of the lesson) will depend on the number of topics and quizzes assigned to it.
Note: If the “Enable Automatic attendance on login” option is enabled, when the student logs in to the website, then all their enrolled courses will be marked as complete, along with creating an attendance entry for all the courses, lessons, and topics for the day.
Enable Activity Logs
If this option is enabled, Admin will be able to generate activity logs of automatically marked attendances.

Enable debug Logs
If this option is enabled, the debug logs will be generated for easy troubleshooting by WooNinjas support teams.

Messages
To locate the message-related settings for this add-on: Navigate to LearnDash LMS, click on the “Attendance” sub-menu, and select the “Messages” tab.
Restrict IP Message Alert
Here, the administrator can type the message alert for the student if the IP address (current) is restricted and does not match the old IP Address (when the student first logged in).

Attendance Logs
Admins can see the attendance count of all enrolled students on the Attendance Logs tab of the Attendance Settings page. Group Leaders can also view the attendance count for all their group members.
You can locate the Attendance Logs by navigating to LearnDash LMS from the dashboard, selecting Attendance, and clicking on the “Attendance Logs” tab.
Admin’s Dashboard:

Group Leader’s Dashboard:
You can find the Attendance Logs by navigating to LearnDash LMS from the dashboard and logging into the Group Leader’s account, selecting Attendance, and selecting Attendance Logs.

Attendance reports can be grouped “By Course,” “By Lesson,” “By Topic,” “By User,” or “By All absent logs”. Then hover over a particular user or course and click “View Detail Logs”.

There is a filter for the attendance table that lets you select whether you want to display present or absent attendance data.

The attendance reports table has the following filters: Course, Lesson, Topic, and Date Range. Filters enable admins to quickly narrow their search and export the filtered attendance logs in CSV format.

Time Logs
Admins and the group leaders can see the time users have spent on LearnDash course contents on the Time Logs tab.

The admin or the group leader can filter the time logs according to the Courses, Lessons, Topics and Quizzes.

Mark Attendance By Users:
Admins can manually mark attendance for a single user or for multiple users on the “Mark Attendance By Users” tab.
Admins need to select the users, courses, lessons, and topics for which attendance will be marked. The admin also needs to select a date range for attendance markings and add a message (optional) that will be displayed when attendance is marked as present or absent. Finally, the admin needs to determine whether attendance will be marked as present or absent.

Mark Attendance By Courses:
Admins can manually mark attendance for a single user or for multiple users by filtering them on the “Mark Attendance By Courses” tab.
Admins need to select the courses by moving them to the right column to mark their attendance. Based on the courses selected, the lessons will be filtered. Similarly, when the lessons are moved to their right column for the attendance to be marked, the topics column will also get filtered. You need to select a date range from the “Select Date Range” option. Providing a message in the “Remarks” option is optional. Finally, select whether the attendance will be marked as present or absent.
Note: In this tab, to mark the attendance of lessons, the courses’ attendance will also be marked. Similarly, to mark the attendance of a topic, its respective course and it’s resective lessons’ attendance will also be marked.

Finally, the admin can determine whether attendance will be marked as present or absent. The admin can also select a date range for attendance markings and add a message that will be displayed when attendance is marked as present or absent.
Help
You can view all the available LearnDash Attendance shortcodes on the Help tab.
1. Display a List/ Table
Shortcode: [ld_attendance]
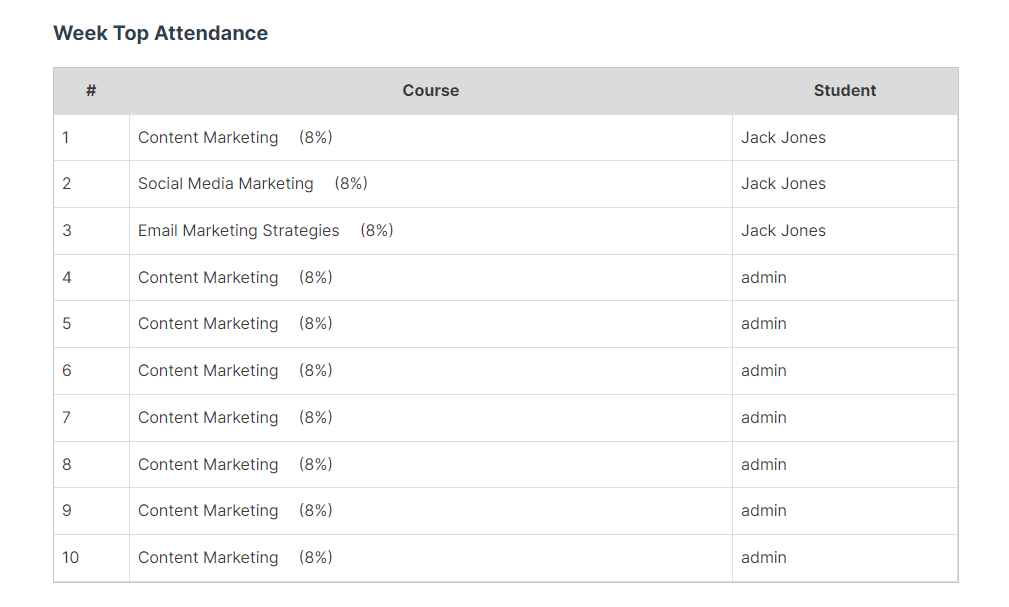
This shortcode is used to display a list/table of users with the best attendance records on any page or post. To display the LearnDash Top Attendance, use the following shortcode:
You can alter the list displayed by setting different parameters, as seen here:
[ld_attendance display="table" course_ids="xxx" user_ids="current" title="Week top attendance" time_frame="13-01-2020,17-01-2020" count="percentage" wrap_id="attendance_week_table_wrap" limit=xxx ]
Shortcode Parameters:
- Title: Enter title to display.
- Display: table/list.
- Count: number/percentage.
- Time_frame: week/month/comma-separated date range.
- Limit: Enter the number of records to show.
- User_ids: comma-separated user IDs/current (to use the current logged-in user ID).
- Course_ids: comma-separated course IDs/current (to use the current course ID).
- Wrap_id: Assign an ID to a wrapping div.
- Group_leader_ids: comma-separated Group Leader’s IDs/current (to use the current logged-in Group Leader’s ID).
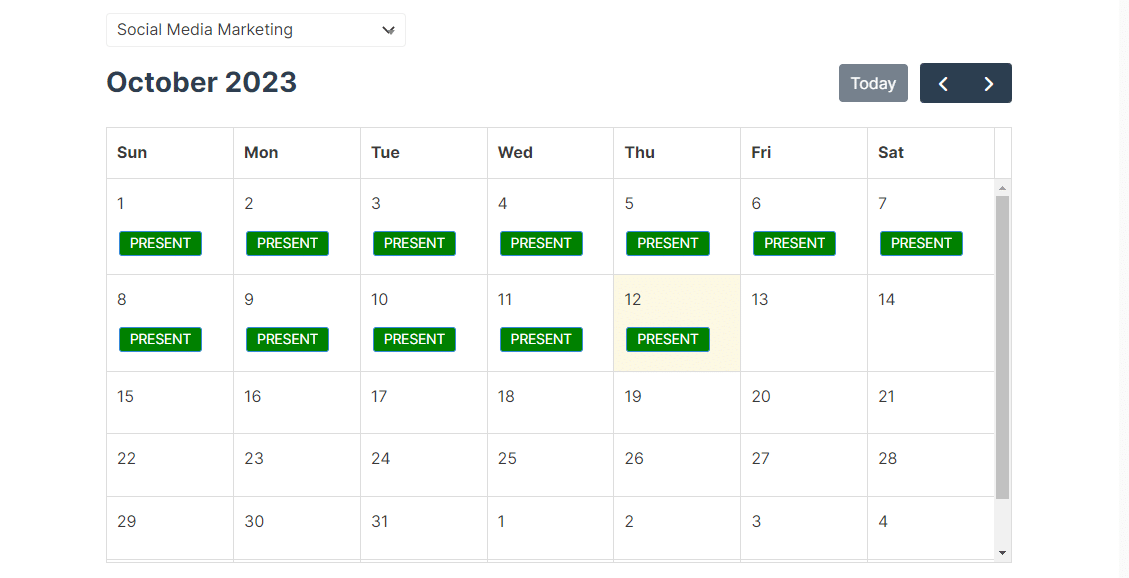
2. Display on a Calendar
Shortcode: [ld_attendance_calendar]
You can use this shortcode to showcase attendance on the calendar. Insert it into any page or post for logged-in users, offering them access to their own attendance records.
Disallow Attendance
Disallow Attendance Tracking For Any Single Course
- Select any course’s edit page from LearnDash > Courses.
- Find the meta box titled “Disallow Attendance” on the right side of the edit page.
- Check the box next to the “Disallow Attendance” option.
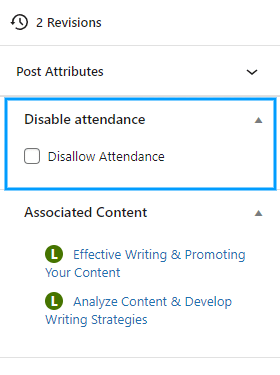
- Publish/Update the course.
Disallow Attendance Tracking For Any Single Lesson
- Select any lesson’s edit page from LearnDash > Lesson.
- Find the meta box titled “Disallow Attendance” on the right side of the edit page.
- Check the box next to the “Disallow Attendance” option.
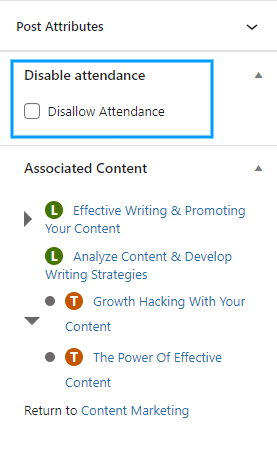
- Publish/Update the Lesson.
Disallow Attendance Tracking For Any Single Topic
- Select any topic’s edit page from LearnDash > Topic.
- Find the meta box titled “Disallow Attendance” on the right side of the edit page.
- Check the box next to the “Disallow Attendance” option.
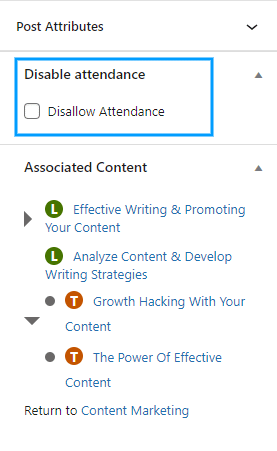
- Publish/Update the Topic.
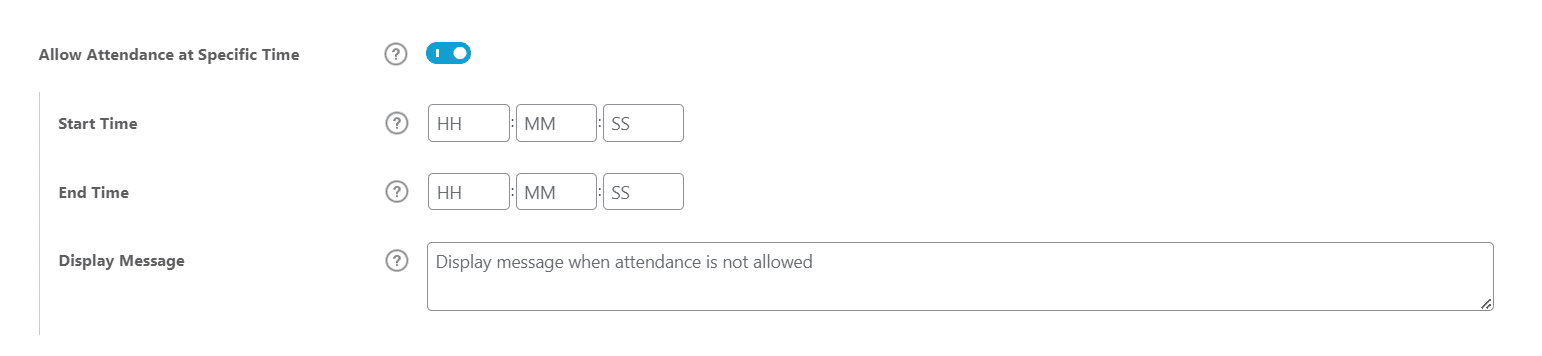
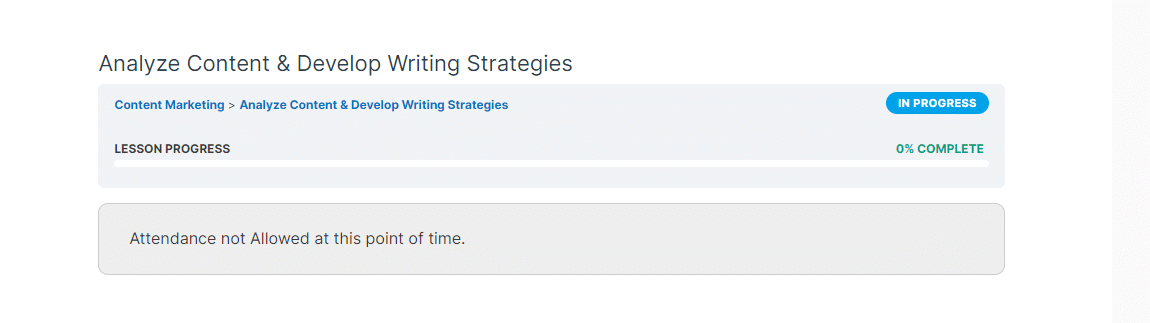
Restrict Attendance Timeframe
- To restrict attendance for a specific course, select any course’s edit page from LearnDash > Courses.
- Go to the settings tab and enable the option “Allow Attendance at Specific Time”.
- Define the start and end times for the duration when students can mark their attendance.
- The admin can specify a message to appear on the front end when students are unable to mark their attendance during restricted hours.
- Publish/Update the Course.
Attendance Summary
The administrator can view the attendance summary for individual students on their respective profile pages, located in the “Attendance Summary” section, for all courses, lessons, and topics.
Gradebook by LearnDash
Our addon integrates seamlessly with the LearnDash Gradebook, allowing you to display attendance directly within the gradebook interface. To set this up, go to LearnDash > Gradebook and create a new gradebook. In the “Grading” section, you can select the courses, lessons, topics, and quizzes for which you want attendance data to be included. The flexibility of this feature allows you to select individual or multiple items as needed.
To ensure attendance is displayed in the Gradebook, make sure to toggle on the “Show Attendance” option. This setting ensures that attendance records are visible, providing a comprehensive overview of learner engagement within the selected items.

Once your gradebook is configured, publish it and copy the shortcode provided. You can then paste this shortcode onto any page of your site to display the gradebook, complete with attendance tracking, for an organized and user-friendly experience.

FAQ’s
The Mark Present button is not showing on the course page to the students.
Please make sure the “Disallow Attendance” option should not be checked on the desired course edit page if you want to allow the user/student to make his/her attendance.
Can a user undo his/her marked attendance?
No, once a user/student marked his/her attendance, it will never be unmarked or undo.
Does the user/student have to mark his/her attendance every time he/she come to the specific course page?
The user/student has to mark his/her attendance once a day.
Where can I check my students’ attendance?
You can check your students’ attendance at the specific course edit page > Student Information.
Which translation plugins are recommended to work with this add-on?
Loco Translate and WPML plugins are recommended to translate the LearnDash Attendance add-on into other languages.
Changelogs
1.10.1
- Fix: Escaped the time tracking AJAX nonce before outputting it in the footer script.
- Fix: Updated the license settings screen to show a clear activated license confirmation message.
1.10.0
- New: Added optional “Mark Attendance by Courses” tab with filtered view and dynamic loading of enrolled users, lessons, and topics.
- New: Added “Enable Filtered Mark Attendance” setting under General Settings.
- Fix: Reworked “Mark Attendance by Users” screen with a faster, searchable dual-list selector UI.
- Fix: Attendance marking now uses AJAX with loading indicators and inline success/error messages.
1.9.7
- Fix: Hardened time log AJAX endpoint with nonce verification and input sanitization.
- Fix: Refactored time log request in injected footer script to use a native `XMLHttpRequest` POST.
- Fix: Time tracking class now initializes reliably at load time.
1.9.6
- Fix: Manual attendance now marks only final quiz(es) complete (not all steps).
- Fix: Auto-marking progress on attendance for in-person lessons and topics.
1.9.5
- Fix: Fixed an issue where the enrolled-student search in manual attendance forms used post_id instead of course_id.
1.9.4
- Fix: Fixed minor security vulnerabilities and improved overall security.
1.9.3
- Fix: Fixed minor UI issues.
1.9.2
- Fix: Resolved PHP Fatal error when Query Monitor plugin is active.
1.9.1
- Fix: Fixed all identified security vulnerabilities.
- Fix: Fixed email-related issues and updated the email layout design.
- Fix: Resolved multiple warnings.
- Fix: Fixed an issue where the debug log file could not be downloaded when it was empty.
1.9.0
- New: Added a new feature to auto-mark progress on attendance mark.
- New: Added a new feature to show the user’s attendance in their profile.
- Fix: Fixed an issue where the attendance mark button was not showing on some content.
- Fix: Fixed an issue where the attendance mark tab was not showing correctly.
- Fix: Fixed an issue where filters export features were not working correctly.
1.8.9
- Fix: Resolved an issue where an empty “license correct” message was displayed.
- Fix: Fixed an issue that prevented group leaders from marking attendance.
- Fix: Fixed an issue where user mark the attendance after enable appearance option.
1.8.8
- Fix: Fixed the issue where content was missing for the Buddy Boss theme.
1.8.7
- New: Update the email templates for improved appearance and consistency.
- Fix: Resolved an issue where lesson and topic attendance button not showing when course attendance is disabled.
1.8.6
- New: Compatibility with LearnDash modern course page.
1.8.5
- Fix: PHP warnings on messages tab.
1.8.4
- New: Added compatibility with the Gradebook plugin to display attendance in the Gradebook report card.
1.8.3
- Fix: Send Email option.
1.8.2
- Fix: Resolved issue where Restrict IP Feature was not working.
- Fix: Resolved issue where Enabled Activity Logs were not visible in the backend.
- Fix: Fixed the UI for Admin Mark Attendance functionality.
- Fix: Resolved issue where the “Show Absent Of Unmarked Days In Reports” option was not working.
1.8.1
- Fix: Speed optimization for auto attendance on login.
1.8.0
- Fix: Admin mark attendance feature.
1.7.9
- Fix: Optimize code for auto attendance.
1.7.8
- Fix: Resolved issues with filters in attendance logs.
- Fix: Resolved issues related to auto attendance marking during login.
- Fix: Resolved issues associated with attendance tracking during user login.
- Fix: Implemented attendance delays to address concerns with attendance marking on login.
1.7.7
- Fix: Removed warnings and depreciated functions.
1.7.6
- New: Allow attendance only within the specific time range.
- New: Disable attendance on each lesson and topic.
- New: Capability to work with shared course steps.
- New: Front-end attendance calendar shortcode.
- New: Activity and debug logs.
- New: UI upgrade.
1.7.5
- Fix: Fixed the license request time issue that can affect website speed.
1.7.4
- Fix: Warnings in attendance shortcode.
1.7.3
- Fix: Restrict IP address issue.
- Fix: Automatic attendance on the login.
- Fix: Attendance logs issue with the date and user filters.
- Fix: Remarks popup content cropping in attendance logs.
1.7.2
- New: Option added to clear attendance and time logs.
- New: Option added to allow different user roles to mark student’s attendance.
1.7.1
- Fix: String localization issues.
1.7.0
- Change: Improve codebase.
- Fix: Text localization.
- New: Add “ld_attendance_allowed_admin_roles” filter to bypass certain user roles as admin.
- Fix: Compatibility issues with LD 3.5 and WordPress 5.8
1.6.5
- New: Filter to bypass group enrollment check on front-end mark attendance user search field.
1.6.4
- Fix: Mark attendance for un-enrolled users.
- Fix: Group leader mark attendance flow.
- Fix: Search filter in attendance logs for Group Leader.
- Fix: Warnings/Notices on CSV export.
1.6.0
- New: Added option to show missing attendance as absent in reports.
- Fix: Admin/Group leader marked attendance gets overridden if auto-login attendance is enabled.
- Fix: Group leaders can see only their groups attendance logs.
- Fix: Exported CSV report displayed on browser instead of downloading.
- Fix: Remove LearnDash Group dependency for “Marking Attendance” button.
- Fix: Typos.
1.5
- New: Send periodic attendance report to users.
- New: Track user’s time on individual course/lesson/topic.
- Fix: Filter logs by attendance type present/absent.
- Fix: Other typos and UI fixes.
1.4
- New: Group leader can access attendance logs of their courses and users.
- New: Admin and Group Leader can mark Lesson/Topic attendance.
- New: Minimum user role to access logs.
- New: Added parameter in short-code to list attendance for specific group leader only.
- Fix: General UI fixes.
1.3
- New: Added option to disallow students to mark attendance.
- Fix: Fixed typo issue in the db query.
1.2
- New: Added option to mark attendance for lessons.
- New: Added option to mark attendance for topics.
- New: Added option to mark attendance automatically on log in.
- New: Allow admin/group user to mark attendance for lessons/topics.
- New: Added option to add attendance in bulk.
- New: Added option mark absent.
- New: Added option to add message with present/absent.
1.1
- New: Added new table to store student’s attendance.
- New: Added new report section for the admin.
- New: Added option to download the attendance report in CSV format.
- New: Added new help tab with shortcode details.
- New: Revamped shortcode to display attendance table on frontend.
- New: Added option to restrict user to mark attendance using different IP Addresses.
- New: Added option to save IP Address, Device name, Date and time with the attendance.
- New: Added option to allow group leaders and admin to mark attendance for the students.
- New: Made the add-on compatible with latest version of LearnDash and WordPress.
- New: Made the add-on compatible with LearnDash labels.
- New: Made the add-on compatible with WordPress time zone.
- New: Added new action/filter hooks.
1.0
- Initial Release.
